We're kicking off a week of Back to School Lunches with the start of another new feature: The Kids Cook Monday!
We've been invited to help Healthy Monday with its Kids Cook Monday campaign by posting great meals and snacks families can make together. Of course, we said yes! Quite a few family-oriented food blogs have signed on, and we're delighted to participate. We encourage you to check out the website for Healthy Monday, a 5-year-old public health project in association with Johns Hopkins University, Columbia University and Syracuse University. And check back here on Mondays for our ideas.
And all this week, we'll share recipes and tips for packing your child's lunch bag. We have three preschoolers, two kindergartners, and one first-grader among us -- and lots of ideas for packing meals kids will enjoy.
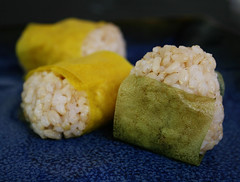 Onigiri is a favorite lunch bag treat for my boys, and something they can help make. Onigiri are essentially Japanese rice balls. You can make them with just rice, or tuck inside bits of diced meats, vegetables, pickles, eggs, whatever. It's a handy way to use up leftover bits from dinner.
Kids can help make onigiri a day or two ahead. You can freeze them for longer storage, but be sure to zap them in the microwave in the morning. They don't taste as good if you leave them alone to thaw.
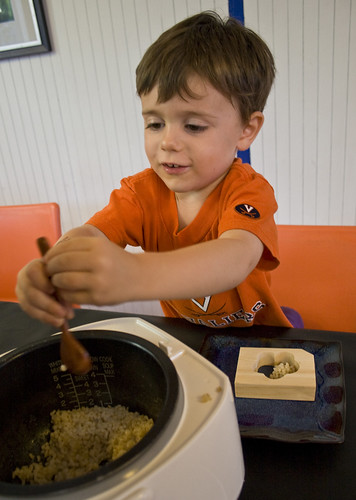
Short-grain rice is easiest to work with. These are impossible to make with long-grain rice -- don't even try! I have a hard time getting brown rice to work with onigiri molds (my 3-year-old loves the wooden flower one in the photo above), but I've had no trouble shaping the rice with the plastic wrap technique described below.
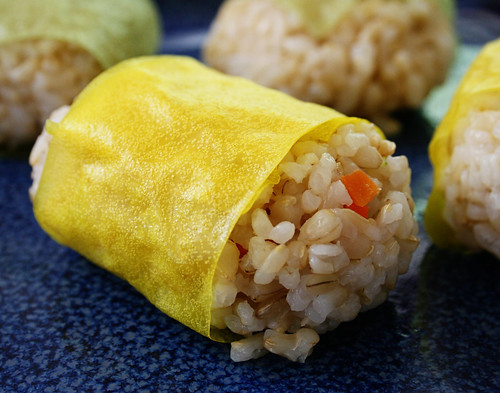
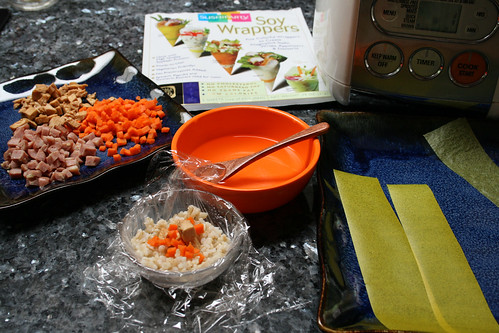
Traditionally, onigiri are wrapped with nori, but my kids don't care for the roasted seaweed sheets. I leave them unwrapped or use colorful SushiParty Soy Wrappers (I find them at Asian markets; go to their website to order online). The variety pack -- including turmeric yellow, paprika orange, and spinach green -- really brightens up a plate.
Finally, you can carefully toast onigiri on the stove top, to make yaki onigiri. One of my boys loves his yaki onigiri brushed with a bit of low-sodium soy sauce. Yum!
Brown Rice Onigiri
Be sure to use short- or medium-grain brown rice (you can substitute white rice). Long-grain, basmati, jasmine rice and the like won't work! This looks like an involved project, but it really takes just minutes once you get the hang of it.
2 cups short-grain brown rice, freshly cooked and hot
salt
water
optional fillings, diced
nori or soy wrappers, optional
small bowl or cup
plastic wrap
salt
water
optional fillings, diced
nori or soy wrappers, optional
small bowl or cup
plastic wrap
Get everything ready for assembling the onigiri. Have fresh, hot rice ready to go with a small spoon for scooping. In a bowl, mix a generous amount of salt with water, which will help keep the rice from sticking to everything. Set out the diced filling options -- you only need a small amount -- on a plate. If you're using wrappers, cut them into wide strips. Keep the roll of plastic wrap close at hand.
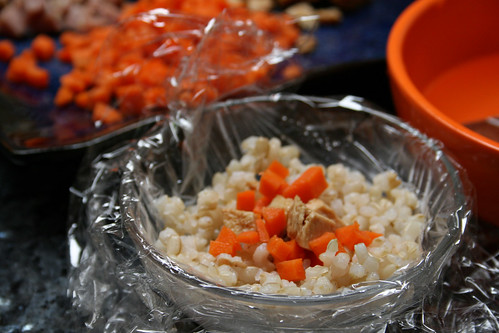
Tear off a small bit of plastic wrap and lay it in a bowl. Have your child dip his hands in the salted water and sprinkle a bit onto the plastic wrap. He can scoop out a small amount of rice into the bowl, then sprinkle a spoonful or so of filling in the middle. Top it off with another spoonful of rice.
Tear off a small bit of plastic wrap and lay it in a bowl. Have your child dip his hands in the salted water and sprinkle a bit onto the plastic wrap. He can scoop out a small amount of rice into the bowl, then sprinkle a spoonful or so of filling in the middle. Top it off with another spoonful of rice.
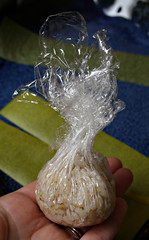
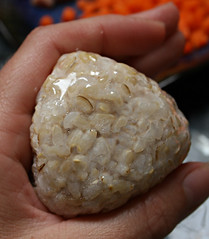 The next step might require a grownup's help: Pull of the sides of the plastic wrap around the rice and twist, packing the rice together. Use your hands to shape your onigiri: You can make a broad oval, a triangle, a square, or a ball.
Remove the plastic wrap. If you're using nori or soy wrappers, you can wrap it around the onigiri now or, if you don't want the wrapper to soften and get a little soggy, when you're ready to eat it. Wrap the finished onigiri neatly in fresh plastic wrap and store in the refrigerator or freezer.

2 comments:
I know this is a couple years old but I'm planning on using some very thin egg "omelet" cut in strips for my grandchildren even tho they will eat the nori paper I think for breakfast a bit of smoked sausage(or fish for me) and a wrap of thin egg would go very well.
Egg strips are delicious and would be fun! I've used this technique to whip them up in the microwave, when I'm reluctant to get out another pan: http://goo.gl/iwKRT. The strips would work nicely on the outside or the inside!
Post a Comment