Monday, December 27, 2010

The Kids Cook Monday: Their Favorite Salad

This post is a mix of a "few of our favorite" recipes and one that can symbolize what the campaign for the Kids Cook Monday aims for: A healthier diet and making a contribution for our kids to be able to like and even make foods that are (unfortunately) excluded from the average kid's menus.
Here's a toast for one of the simplest, yet successful, recipe I shared in this blog in 2010. Later after I made it with our playgroup friends, this recipe and step to step guide was shared with about 60 kindergarteners and first graders of my son's school. It was my first project for their Wednesday Cooking Club, where I currently teach hands-on recipes once a week with two enthusiastic volunteers and one amazing school teacher.
During three weeks we witnessed how kids minds are so opened to try out something new - and how their participation on the prep can make a difference. The result was amazing: few leaves of Romaine lettuce were abandoned on the plates. The resemblance with a classic "grown up" Caesar Salad, the happiness to find out that they could use scissors to cut, the wonderful aroma of the croutons coming from the oven - all made the kids curious to try the salad. And some were so proud that they wanted to bring the recipe home to share with their family.
Scissors Salad


Croutons:
4 slices wheat bread
Garlic powder, to sprinkle
Grated Parmesan cheese, to sprinkle
Olive Oil Spray

Salad
5 large leaves of Romaine (or 10 hearts) of Romaine lettuce
Cherry tomatoes, if in season, (to taste)

Dressing:

1 tbsp olive oil
2 tbsp apple juice
1/2 tsp garlic powder
1/4 tsp dried basil or other herb
1 tsp mustard
1/4 tsp salt
1/4 tsp fresh ground pepper (optional)

Invite the kids use their very well washed craft scissors to cut the bread to small squares. Show to them how to spray olive oil on the bread pieces, and ask them to sprinkle it with garlic powder and Parmesan cheese. The scissors will be used to chop the Romaine leaf and will leave it on the side in a bowl. In the meantime toast the croutons in a 350 F pre-heated oven for about 7 minutes. In a small bowl let them measure and mix the ingredients for the dressing. They can now prepare their final salad, dressing it up, adding the homemade croutons Have fun! And a Happy and healthy new year!

Wednesday, December 22, 2010

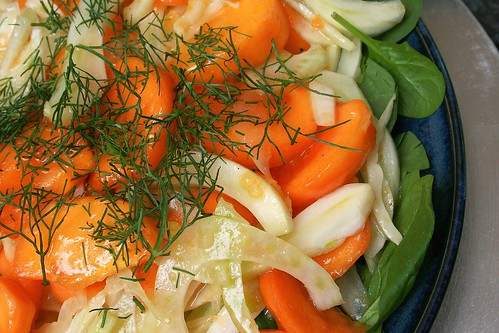
A Few of Our Favorite Things: Persimmon and Fennel Salad

091204_persimmon salad_3

I'm already looking ahead to detox after the holidays. This refreshing salad has great crunch and just the right touch of sweetness -- a welcome break from the hearty meals and sweets we indulge in this time of year.

The original recipe calls for preserved lemons, but fresh lemons can be readily substituted. If you like this, though, I recommend starting a batch of preserved lemons for the future. They're fantastic in salads!

Be sure to use Fuyu persimmons, which are round and best enjoyed on the firm side. The heart-shaped hachiya persimmons need to be very ripe and soft, and won't work here. Fennel is also known as sweet anise. You'll need the bulb and fronds for the salad; save the leftover stalks to serve with dip, like celery.

Persimmon and Fennel Salad

You probably won't need to add salt if you use preserved lemons (recipe below).

1/2 preserved lemon, rinsed well and diced, or grated zest from 1/2 a lemon
juice of half a lemon (Meyer, if you have one)
1 tablespoon olive oil
1 fennel bulb
3 Fuyu persimmons
salt and pepper to taste
2 ounces baby spinach

Combine preserved lemon or zest, lemon juice, and olive oil in a large bowl. Whisk to combine.
Wash fennel bulb and remove any tough outer layers. Cut the stalks and fronds just above the bulb and set aside. Cut bulb into quarters and remove the tough core. Thinly slice fennel and put in a large bowl.
Peel persimmons and cut into eighths; add to bowl.
Stir gently, taste, and add salt and pepper to taste.
Serve on top of baby spinach leaves and sprinkle with chopped fennel fronds.


Preserved Lemons

Use organic lemons -- you eat these peel and all, and it's worth the trouble to find ones that haven't been sprayed.


organic lemons (Meyer are especially good, but any kind will work)
kosher salt or coarse sea salt
large jar with tight-fitting lid
optional spices: cinnamon stick, cloves, cardamom pods, bay leaves, coriander seeds, fennel seeds, peppercorns

Be sure to have enough lemons to fill your jar, plus extras for juice.
Sterilize your jar and lid by boiling in water for 10 minutes.
Scrub lemons well. Cut away any stems. Slice the lemons almost completely in half, but not all the way through. Make another cut, perpendicular to the first, so you've cut the lemons nearly into quarters. Pack the cuts with salt and put lemons in the jar. Pack firmly! Add any spices, if you wish, and add enough lemon juice to completely cover the lemons.

Shake the jar every day or two to evenly distribute juice and salt. As lemons soften, add a few more.

After a month, your lemons are ready! They're very salty: Rinse before using, and taste before adding more salt to a dish.

I've been assured the jar never needs refrigeration, but I stick it in the fridge after opening it. The pickling juice can be reused over the course of the year.

Monday, December 20, 2010

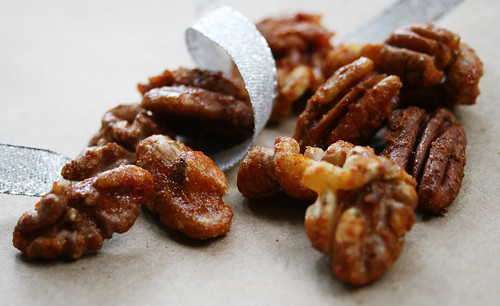
Kids Cook Monday: The Best Spiced Nuts

20101209_spiced nuts_1


These might have too much sugar to qualify as a purely healthy contribution for The Kids Cook Monday campaign, but they sure beat all the other holiday sweets lying around.

I first made these nuts a few years ago as a Christmas gift for my mother. They're now the only kind of seasoned nuts I make because, as the recipe's genius creator notes, they are the best spiced nuts.
How good?
  • The kids can't stop eating them.
  • One dad says he wants two things when he retires, and one of them is to have these nuts every day. (I didn't find out what the other thing is, because he was too distracted by the nuts.)
  • I lost the original recipe, but when I saw it re-posted at The Hungry Tiger, I did a little dance and ran to share the news with my husband.
That's how good they are.

The flavor is nuanced and addictive. The secret is the Thai hot sauce Sriracha and garam masala, a seductive Indian spice blend. (Think cumin, cinnamon, cardamom...) If you can't find it in a store near you, you can easily mix your own. There are lots of recipes for it, but this one relies on readily available spices you may have on hand. If you're looking for more of a project, there are countless recipes online for toasting your own seeds.

The two kids I recruited to help loved running the stand mixer and smelling the vibrant, colorful seasonings. Kids can help with every step except sliding the nuts off the hot cookie sheets. This comes together quickly and makes a great holiday gift -- I'm bringing another jar home for the holiday. Here's the recipe, courtesy of The Hungry Tiger.

Best Spiced Nuts

I decrease the sugar by just a few teaspoons because I can't help trying to de-sugar the kids. This makes about 6 cups.

Raw, unsalted walnuts, pecans, and/or almonds
2 egg whites
1 tablespoon olive oil
3/4 cup of white sugar
2 teaspoons salt
2 teaspoons garam masala
1 tablespoon paprika
1 teaspoon Sriracha or other hot sauce
1 teaspoon soy sauce

Preheat the oven to 325 degrees. Line two cookie sheets with parchment paper (don't skip this; this mixture can make a mess of a baking pan).

Beat the egg whites until they're foamy but don't hold a peak. Add everything else except the nuts, and mix together. Now start piling in the nuts, and stir to coat them well. Kids who like getting messy might enjoy using their clean hands to do this part.

Spread the nuts on the parchment-lined baking pan in a single layer. If you have leftover coating in the bowl, toss in more nuts to coat and add them to the pan.

Bake the nuts for about 30 to 40 minutes — start checking them at 25 minutes or so. When you take them out of the oven, slide the parchment and nuts right onto the counter or a rack. Wait a few minutes so that they aren't painfully hot and steal a little nibble. Leave the rest alone until they cool completely, then break them up into pieces.

Store in an airtight container so they stay crisp. I left some sitting out a little too long and they got gooey; 20 minutes in a 200 degree oven crisped them up again.

Friday, December 17, 2010

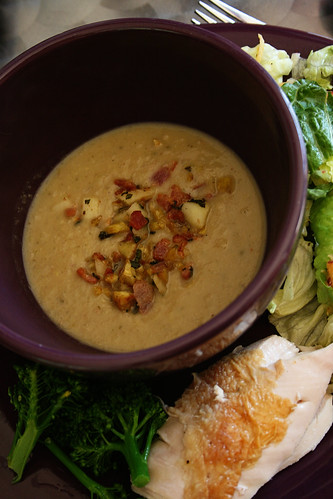
A Few of Our Favorite Things: Chestnut Sage Soup

IMG_6494This is a surprisingly delicate, complex soup, sweet and savory, with nice texture. It can easily be the star of a holiday meal.

How much work it is depends on the chestnuts: Vacuum-packed chestnuts from a jar are a perfectly acceptable shortcut, one I recommend. Fresh chestnuts are lovely, but peeling them is quite a project. You can peel them ahead of time and freeze them until it's time to make the soup.

Chestnut Sage Soup

Adapted from Jerry Traunfeld, The Herbal Kitchen

This is a lot of work if done all at once. If you don’t buy peeled chestnuts, I heartily recommend peeling them in advance and freezing them until you need them. The diced bacon also can be cooked ahead of time, to save on-the-spot prep.

Serve with a simple, straightforward main dish, such as roast chicken.

1 pound chestnuts, fresh in their shells, or 1/2 pound dried chestnuts, or two 7-ounce jars vacuum-packed peeled chestnuts
1 medium onion, chopped
1 ½ cups celery, sliced
1 tablespoon unsalted butter
4 cups vegetable broth
¾ cup apple cider or apple juice
¼ cup sage leaves, fresh, coarsely chopped
1 bunch thyme sprigs, tied with string
2 bay leaves
¼ teaspoon vanilla extract
½ cup half & half
¼ cup sherry, dry or medium-dry
dash kosher salt
dash ground pepper
2 ounces bacon or pancetta, diced
1 tablespoon sage leaves, chopped
½ apple, unpeeled, cored and diced

If using fresh chestnuts, bring a saucepan of water to a boil. Carefully cut the chestnuts in half with a sharp knife and put them in the freezer for 10 minutes. Add the chestnuts to the boiling water; boil for 8 minutes, then drain. Squeeze each half to pop out the meat, along with the dark brown pellicle surrounding it. This is much easier to do while the chestnuts are hot; you might want to do this in batches. If using dried chestnuts, bring a large pot of water to a boil. Add the chestnuts and simmer 10 minutes, then remove from heat and let soak for an hour. Vacuum-packed chestnuts can be used straight from the jar.

Cook the onion, celery and 1/4 cup coarsely chopped sage in a large saucepan over medium heat, stirring frequently, until onion and celery are soft, about 5 minutes. Stir in all but 1/2 cup of the chestnuts along with the broth, cider, thyme, and bay leaves. Cover and simmer over very low heat for 45 minutes. Remove and discard the thyme and bay leaves; stir in vanilla.

Puree the soup in batches in a blender (be careful not to overfill) until very smooth. Pour back into saucepan, stir in cream and sherry, and reheat to simmering. Add salt and pepper as needed.

Cook the bacon in a medium skillet — don’t let it get crisp. Drain excess fat, then add in the reserved chestnuts and cook another minute. Stir in apple and cook until warmed through.

Spoon soup into bowls, topping each with the apple-chestnut garnish.

Thursday, December 16, 2010

A Few Of Our Favorite Things: Chicken Cordon Bleu with Sundried Tomatoes and Shallots

Irresistible, crunchy, smokey, and with some cheese melted in its core. This is an easy and delicious way to have a break from the holiday staples, yet a classic way to enjoy chicken at its best. It's a kid-friendly dish and it might be a chance for introducing other flavors to a good-looking plate.

I will prepare it again this week - and probably will add a nice seasonal touch to it. It might be some cranberry goat cheese to substitute for the dried tomatoes and Swiss cheese. Either way, just the thought of it makes me feel like preparing and enjoying it soon.

Chicken Cordon Bleu with Shallots and Sun-dried Tomatoes

I used julienned sun-dried Roma tomatoes conserve and fresh shallots for the main personalities of this stuffing.

4 skinless and boneless breasts of chicken, butterflied
4 slices mesquite turkey
4 slices Swiss Gruyere cheese
1 medium shallot, thinly chopped
4 tablespoons sun-dried tomatoes in olive oil, thinly chopped
Kosher salt to taste
Freshly ground pepper
1 egg, beaten
1/2 cup water, added to the egg
1 cup flour
1 cup panko (or normal breadcrumbs), to coat rolls

After butterflying each chicken breast, sprinkle both sides with salt and pepper and cover both sides with plastic food wrap. Pound each side with the flat part of a pounder until the chicken is about 1/4 inch thick. Remove plastic from one side. Cover chicken with one slice of Gruyere cheese and one of smoked turkey. Spread mix of sun-dried tomatoes and shallots over turkey. Firmly roll the chicken breast with the help of the remaining wrapping plastic. Tuck in the edges and keep it held together tightly with the plastic. Repeat for each breast. Refrigerate rolls for at least 1 hour.

Preheat oven to 400 F. Beat egg with water. Remove plastic wrap from chicken, and coat rolls with the egg mix, a layer of flour, and then panko (or regular breadcrumbs). Roast for about 30 minutes on the middle rack of oven. Make sure the core is cooked, and slice the rolls. Enjoy with your favorite veggie as a side.

Tuesday, December 14, 2010

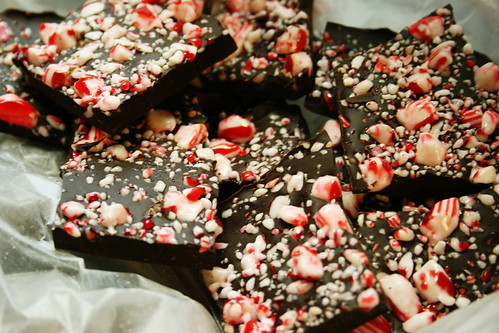
Second Helping: Fast, Easy, Fantastic Peppermint Bark

20101210_CPE bark_1

This is the point in the holiday season when I cull my list of good intentions and, for the sake of sanity, toss aside any plans that would cause more stress than joy.

Cutting out and decorating sugar cookies didn't make the final list. Practicality demanded quick, easy sweets, like peppermint bark.

If you've only had peppermint bark out of a box, you might be embarrassed to find out you paid way too much. You need only two ingredients: peppermint candy and chocolate.  I'm starting you off here with the simplest preparation, and then layering on the fancy for those of you who aim high.

Peppermint Bark

This simple, addictive treat is fun to make with kids and is a great gift for neighbors or lunch box treat. A few tips: To crush the candies, pulse them in a food processor or put them in a heavy, sealed plastic bag on the counter, cover with a towel, and crush with a mallet or rolling pin. I usually sift out the resulting powder and stir it into the melted chocolate. Freezing the candy canes for an hour makes it a little easier. The amounts given are just guidelines; adjust proportions to suit your taste. Finally, be sure to use baking chocolate rather than chips, which don't melt as smoothly.

8 oz. semisweet or dark chocolate
6 candy canes

Cover a baking sheet with parchment or waxed paper. Melt the chocolate in a double boiler or the microwave (cook at 50% power for 1 minute at a time, stirring in between, until melted). Pour the chocolate onto the prepared baking pan, spreading it evenly. Sprinkle crushed candy on top and refrigerate until firm. Break up bark and keep refrigerated in an air-tight container.

Fancied-up variations

Glossy: Stir a teaspoon or so of vegetable oil into the chocolate for added shine.

White Chocolate: Substitute white baking chocolate for the semisweet or dark chocolate.

Extra Minty: Add a dash of peppermint extract to the melted chocolate.

Two-Tone: Melt 8 ounces semisweet or dark chocolate and pour into baking pan; refrigerate 30 minutes. Prepare rest of recipe as described above, using white chocolate and pouring it on top of the now solid chocolate layer.

Thursday, December 9, 2010

Second Helping: Home-Brewed Root Beer

100918_CPE_rootbeer_3

I fondly remember the days when I regarded soda as a special treat. My favorites were birch beer, cream, and the crazy fruit flavors of Squeeze soda. I loved visiting the small Squeeze plant nearby and picking among the lollipop-colored sodas. My dad relished Moxie, which I found horribly bitter. But we did find common ground with root beer, which we occasionally brewed ourselves.

My boys love "root berry," a rare treat reserved for the handful of baseball games we attend each summer. And Anna's boys savored a souvenir pack of Route 66 root beer from a vacation on the fabled highway.

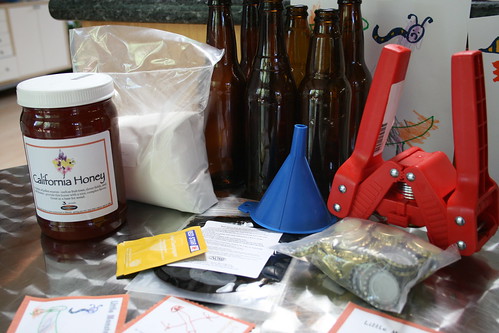
So we opened the Little Monsters Root Beer Brewing Co. for an afternoon to learn how soda is made -- kitchen science! The kids were thrilled, and intrigued by the element of danger: a large, bubbling cauldron, and a small chance of exploding bottles.

100917_rootbeer_03Anna turned scanned copies of the kids' drawings into custom labels. The kids cut them out while we prepared the ingredients.

You can buy a modest brewing kit online for $15 to $30. In retrospect, I should have gone this route. I thought I'd do better  at a local brewing supply shop. I hadn't done my research, and had no idea it was OK -- in fact, even preferable -- to make root beer in recycled plastic bottles. Instead, I spent more than I should have on things like a $15 gadget to secure metal caps onto our recycled glass bottles.

100917_rootbeer_14


We used a Gnome soda recipe that called for yeast, honey, cane sugar, water, and root beer extract.

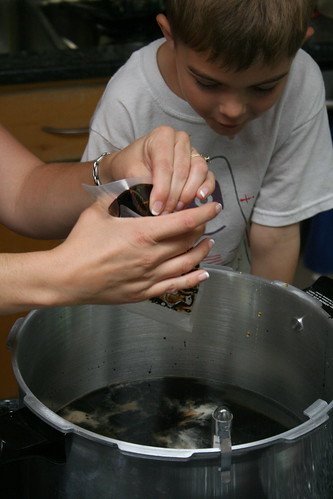
It's easy to make: You need to use a thermometer to monitor the temperature of the mixture, but there's nothing tricky about the process. The kids took turns dumping ingredients into the giant canning pot, marveling at the amount of sugar. We talked about how yeast works, in foods like bread and in root beer.

100917_rootbeer_27
While mixing up the soda was easy, bottling and storing it was more problematic. Because of that yeast.

Yeast basically eats sugar, creating the carbonation. Chilling the bottles gets the yeast to quiet down. If the carbonation process continues unchecked, pressure builds up and bottles can explode.

So the bottles need to stay warm long enough for the yeast to do its thing, but not so long that the bottles burst. What I read and was told recommended letting the bottles to sit out for 24 to 48 hours. That seems a long window when you risk an explosion.

Exploding bottles are no fun. As Anna could tell you.

Which brings me back to plastic. If you use plastic bottles, there's no risk of shattered glass in your kitchen or refrigerator. And you'll know it's time to chill your soda and quiet down the yeast when the plastic bottle becomes firm.

We chilled ours after 24 hours, and waited a few days to open the first bottle. The kids were giddy ... and then they picked up on the aftertaste. Strong, dark, a little medicinal. It didn't stop them from enjoying their custom soda, but they didn't gulp it down like they do at the ballpark. But they didn't mind at all: The soda was OK, but the grand experiment was "awesome!"

Two months out, and I find the flavor in the few remaining bottles has mellowed some and is more enjoyable from start to finish. We might experiment with another brand of extract, a smaller batch, and plastic bottles in the future.

Monday, December 6, 2010

Kids Cook Monday: Savory Wheat Pancakes


A brand-new flour sifter and a ball whisk made the magic. They were so fancy that the kids asked to cook with me this Monday afternoon. Attracted by the new gadgets, the boys were pleased to know about what they were to prepare: Parmesan cheese pancakes. A nice and nutrition-loaded light dinner to celebrate one more post related to the campaign The Kids Cook Monday.

This very versatile variation of the Brazilian staple is a healthier interpretation: whole wheat flour, omega-3 eggs, and canola oil add more nutrition to the dish. The kids were happy to eat it plain with a generous dash of my favorite spread. But if you are willing, they can be rolled as traditional Italian manicotti and filled with spinach and ricotta cheese or even minced beef with veggies. Next time I will try to make them with spelt flour, adding some sunflower seeds to the dish -- I will let you know how that comes out.

Wheat Pancakes

If you don't have wheat flour available, don't worry: any good all-purpose, unbleached flour will bring nice results.


1 cup 100% whole wheat flour
1 egg
1 tablespoon canola oil
1 cup 2% milk
1 teaspoon salt
1/2 cup Parmesan cheese, shredded
ground nutmeg, to taste

Sift flour and reserve in a bowl. Whisk egg, oil, and milk together in another bowl. Add sifted flour to the mix, whisking constantly. Whisk in cheese, salt, and nutmeg. Let the mix stand for 15 minutes.

Heat skillet or griddle. Pour pancake mix onto the hot surface. With the help of a heatproof spatula, spread the pancake in the desired shape. When it starts to detach from the edges of the skillet or griddle, turn it over and cook until it is golden and looks ready to be devoured.

Thursday, December 2, 2010

Playdate Special: Pear and Cranberry Sauce Skillet Pie


Little I knew about the sisters Tatin when I chose to prepare this pie, inspired by the classic French dessert, with my leftover homemade cranberry sauce. So, after reading the many stories about it and learning some basics about its preparation, I waited for Darienne to arrive to talk about and prepare it. My plan was to invite the kids to cut the beautiful and soft ripe Williams pear and make the design of the pie on the bottom of the skillet. But I also had other plans for Darienne: a package of marshmallow and another of powdered sugar were over the counter with my hopes that she would teach me how to prepare marshmallow fondant.

Of course, she did. And I think the result was so good that I will dare try preparing another batch by myself soon.

Anyway, back to the Tatin's pie -- made originally with apples, nothing else than apples: Its preparation is charming, the ingredients are elegant, and the result can be amazing if you have the courage to flip the pie at the right time. To prepare the top of a pie on the bottom of a oven-proof skillet is the beginning of the reverse process. The boys were too busy to come to the kitchen and help, so we let them play soccer in the backyard. After 30 minutes we were devouring the pie with our eyes. And we loved its taste and texture. One of my boys had a big slice for dessert and asked for more. I must admit that we moms loved it so much that even if the kids are not interested on trying it, the beautiful creation of the French sisters will be inspiration over and over again in our kitchens.

Pear and Cranberry Sauce Skillet Pie


I used frozen pie dough from Trader Joe's, thawed, but you can use your own recipe. Also, my cranberry sauce was made with apple juice, Concord grape kosher wine, and juniper berries. Darienne chose cardamom to be the seasoning for the pears.

1 tablespoon butter
1 tablespoon brown turbinado raw sugar
1 large ripe pear, cored and sliced
1 cup cranberry sauce (homemade with the fruit -- see recipe below) *
1 round pie crust (good one here for paté brisée)

* For the cranberry sauce:
1 package cranberries
2 cups unfiltered apple juice
4 tablespoons raw brown cane sugar
10 juniper berries
2 tablespoons sweet Concord grape wine (or any brandy)


To make the cranberry sauce: Cook all ingredients over medium heat for about 15 minutes. Let cool before serving.

To make pie: Thaw pie crust to use it at room temperature. Preheat oven to the temperature recommended by the package, or the one you use normally. Now, on the stove top, melt butter in a shallow, ovenproof skillet. Before it gets brown, add sugar. Arrange slices of pear in the skillet, over the melted butter and sugar, to cover the entire surface. Cook on medium heat until pear slices are almost translucent. Distribute cranberry sauce evenly over the pear slices.

In the meantime, stretch pie dough to the circumference to fit the top of the skillet. When all is bubbling and smells good, lower the heat and cover the fruit with the pie dough, forming a lid for the skillet. With the help of a wooden spoon or spatula, push the dough down against the edges of the skillet.

Remove skillet from stove top and put in the hot oven for about 12 minutes or until the crust is golden brown. Remove from the oven and let it cool down for few minutes. When the edges pull back from the edges of the skillet, cover with the skillet with a serving plate and flip it. Shake a little bit to help all fruit to come together to the plate. Good luck and bon appetit!

Monday, November 29, 2010

Kids Cook Monday: Jewel Salad

101116_jeweled salad_2

I'm in love with this seasonal fruit salad, a happy accident that came together on a day when nothing else was going smoothly.

We had leftover brownies and pumpkin bread on hand, but not much more. I was barely able to clear off a table before the playdate -- I hadn't put any thought into making something new.

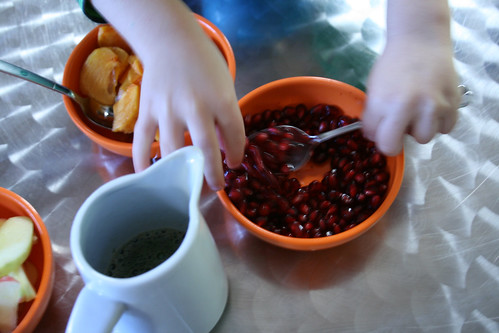
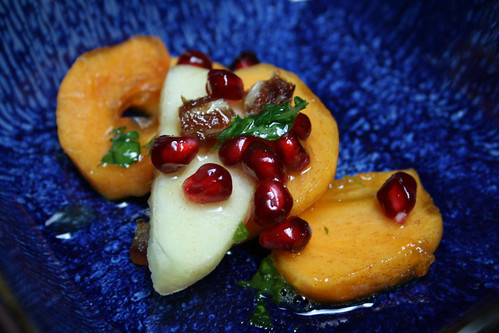
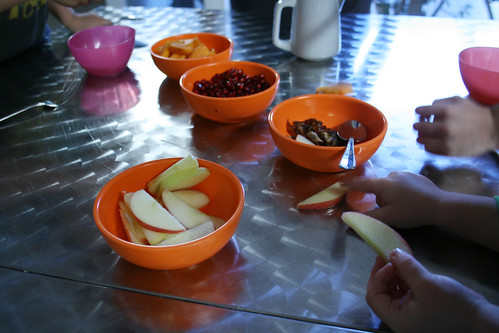
Fresh fruit to the rescue. I sliced up persimmons and apples, pulled apart a pomegranate, and chopped up some dates. The dressing came together quickly, and Anna suggested the perfect finishing touch: a dash of cinnamon and a bit of fresh basil.

I invited the kids to make their own salads. They sampled freely, lighting up with surprise when they tasted something they liked ... and wrinkling their noses when they nibbled something less appealing. In the end, each enjoyed a personalized dish of late autumn's best. A healthy, perfect little something for The Kids Cook Monday!

If you're crazy for persimmons, try Persimmon Compote, which is delicious stirred into yogurt or oatmeal or spooned over ice cream. We also have Persimmon and Fennel Salad, a crunchy and colorful salad with greens.

101116_jeweled salad_4

Jewel Salad

Pears are a nice substitute for the apples. For tips on using fresh pomegranate, check out this post.

arils from 1/2 a pomegranate
2-3 Fuyu persimmons, peeled and sliced
2 apples, cored, peeled, and sliced
4 dates, pitted and chopped
juice of 1/2 a lemon
water
Dressing:
juice of 1/2 a large orange (about 2 ounces)
2 tablespoons cider vinegar
1 tablespoons honey
1/8 teaspoon cinnamon
1 teaspoon chopped fresh basil (optional)

Combine the lemon juice and two cups of water in a small bowl. Add the apple slices and let sit for 10 minutes (this helps prevent browning), then rinse and drain well.

Set out apple slices, persimmon slices, pomegranate, and dates in separate bowls.
In a small bowl, combine dressing ingredients and whisk until blended. Pour dressing into a cream pitcher or measuring cup to make it easy to pour.

Children can spoon fruit into their bowls and pour dressing over it.

If you're making this without the help of little hands, just combine all the fruit in a large bowl, add dressing to taste, and stir to combine.

101116_jeweled salad_3

Wednesday, November 17, 2010

Second Helping: Maple-Vanilla Sauteed Apples

101102_CPE apples_6

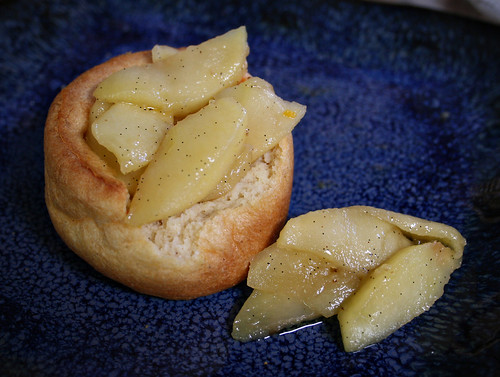
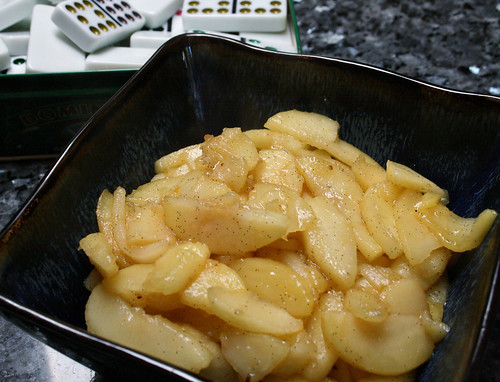
Sauteed apples have great versatility for such a simple comfort food. Quick to prepare and satisfying, they're a mouthwatering match for savory roasted meats, and just as good spooned over pastry or ice cream.

The kids devoured this as an after-school snack. I served it with citrus cardamom popovers, one of our family favorites. The popovers lacked pop -- I was so distracted chatting with Anna that I absentmindedly opened the oven to check on the popovers, a sure way to end up with deflated puffs. But they still tasted good, and no one seemed to mind. They disappeared rapidly, along with these apples.

101102_CPE apples_1


Maple-Vanilla Sauteed Apples

These are delicious alone, and wonderful paired with ice cream, yogurt, popovers, waffles, or oatmeal.

1 tablespoon coconut oil or 2-3 tablespoons butter
4 apples, peeled, cored, and sliced
1 tablespoon maple syrup
1/2 vanilla bean, split lengthwise and scraped, or a splash of vanilla extract
pinch of cardamom (optional)

Melt coconut oil or butter in a large skillet over medium heat. Add apples and saute 5 to 10 minutes. Add maple syrup, vanilla, and cardamom and cook a few minutes more.

Monday, November 15, 2010

Kids Cook Monday: Tapioca Flour Cheese Popovers

We all love popovers here and can't wait to see them again every Autumn. Darienne's recipe is a great one, and watching her to prepare a batch for a playdate, I just realized how similar the Brazilian "pão de queijo de liquidificador" (cheese puffs made in a blender) is to the American Thanksgiving staple. Inspired by this similarity and the possibility of having an alternative recipe for the friends who are gluten intolerant, I prepared one batch of it for our last snack playdate.
Like wheat flour popovers, those have also a life of their own, and have to be in the oven up to when ready - anxiety is not a friend of those, and opening the oven is sort of ultimate sin. A change on the Brazilian classic is the method: I grew up believing that you would need a blender to prepare it. But now I know that this is not necessary. A good whisk will do the job as well as the electric gadget.
So, if you want to try something very different but still very in tune with the coming holiday you might enjoy this. Kids loved it and approved it.  They were invited to prepare it with us but chose to play instead. But if you want to insist on their participation, they can break eggs, whisk, measure and have fun.

Tapioca Flour Cheese Popovers

I sometimes buy the tapioca flour (or starch) at Asian markets. Lately I tried a wonderful organic one from Amazon, imported from Brazil. A bit pricey, but with perfect results.

2 cups tapioca flour
1 cup grated Parmesan or Pecorino cheese
Kosher salt to taste
2 eggs
1 cup fat free milk
1/2 cup canola oil
Dried rosemary  to sprinkle on the top


Pre-heat oven to 380 F. Grease with oil or oil spray aluminum muffin cups. Combine dry ingredients and set aside. In a bowl beat eggs, and gradually add oil and finally milk. Pour liquid over flour, whisking constantly. When everything is well mixed - and it will be incredibly liquid - pour on baking cups. Bake for around 30 minutes or when the tops is getting golden. Enjoy and Happy Thanksgiving!

Monday, November 8, 2010

The Kids Cook Monday: Pumpkin Tostadas with Black Beans

The kids did help make this Kids Cook Monday recipe -- but they didn’t eat much of it. They suspiciously eyed the bowl of pumpkin salsa and beans, and all but one bypassed it completely in favor of plain cheese-topped tostadas, one adorned with a pumpkin-seed happy face.

Yet the adults liked it, it was easy, and I know that somewhere out there is a child who likes salsa. So I’m sharing it with you today.

I threw this together for an after school snack during a hectic week. I really worked hard on it: I opened two cans, one jar, and a bag of shredded cheese. Feel free to roast a pumpkin yourself, chop up fresh salsa, cook the beans from scratch, and make your own tortillas. I’ll watch from here.

Oh, I confess: I offered raw pepitas and fried some sage leaves to fancy it up. I couldn’t keep it that simple.


Pumpkin Tostadas with Black Beans

This is an easy way to use up leftover bits of canned pumpkin. It makes enough to serve 8, with some leftover salsa.

8 tortillas, whole-wheat or corn
olive or canola oil
1/2 cup salsa (I used Trader Joe's Double Roasted Salsa)
1/2 cup canned pumpkin puree
1 can black beans, rinsed and drained
shredded Mexican cheese blend
raw pepitas (optional)
fried sage leaves (optional; see recipe below)

Preheat oven to 400 degrees. Brush both sides of tortillas with oil (or spray well with oil) and arrange in a single layer on baking sheets. Bake for 5 minutes, then turn tortillas over and bake another 3-7 minutes or until crispy. Remove from oven and let cool.

In a large bowl, have kids combine salsa and pumpkin puree, stirring until blended. Set out the pumpkin salsa, the beans, cheese, pepitas and sage.

Set a crisped tortilla before each child. With a spoon, they can spread salsa over the tortilla, then help themselves to whatever other toppings they want.

Return the topped tortillas to the oven and bake until the cheese melts.

Fried Sage Leaves

fresh whole sage leaves
olive oil
salt

Wash sage leaves and dry well, blotting with a paper towel. Heat olive oil in a small skillet. Drop a few sage leaves in at a time and watch them carefully: They should turn a deep pine green and crisp in under 30 seconds. Don’t let them brown! Remove them with tongs and set on a plate lined with paper towels to drain and cool. Sprinkle with salt to taste.

Save the leftover sage-infused olive oil for cooking or dressings.

Thursday, November 4, 2010

Playdate Special: Homemade Hummus

Sometimes they just want to play. And the "cook" and "explore" part of the deal is just not so convenient for "that" energetic time of the day. That seemed to be the case with our afternoon-snack playdate on a sunny afternoon before Halloween. The original plan was good: I wrote down a easy recipe in a very readable 18 font size, so that the 6-year-old boys could read it loud. I gathered all measurement cups and took my lovely mini-food-processor from the cupboard. But nothing in this world was good enough to stop them. So, they played.

In the meantime, Darienne and I had fun watching the fresh garbanzo beans turn into a paste. We gradually added all ingredients in the noisiest food processor ever, and tasted it up to the point when we felt that hummus was ready to be served.

And for our pleasure, the kids came back hungry and curious enough to try this very tasty homemade treat, very different from the ones we buy from the store. Hummus was tasted with toasted mini-ptta bread, slices of cucumber, baby carrots and the seasonal Boo chips. There we had the "explore" part of the mission. To add fun to the story, they built up a very improvised clubhouse in the backyard made of cardboard and a clothes dryer.  In their little imaginative play, the al fresco restaurant was just the ideal place to have their snack. And for us, the moms, preparing the snack was again a playful time to catch up.

Little Monsters Homemade Hummus

I used freshly cooked garbanzo beans. If you are in the mood to try that, just follow the package instructions. I added garlic, olive oil, and salt to the water, and as always, soaked the beans overnight. I truly believe it's possible to have very good results with canned beans. And as Darienne suggested, adding a bit of bell peppers is a great touch to the hummus.

1 1/4 cups cooked garbanzo beans, drained
1 teaspoon garlic powder
1 tablespoon olive oil
3 teaspoons lime juice
Kosher or sea salt to taste
1 tablespoon tahini
Water to thin the mix (if using freshly cooked beans, use water from the pot)
Paprika or zaatar to garnish

Start processing the beans on medium speed. Add gradually the garlic, olive oil, lime juice, salt and tahini and process for enough time to have all ingredients very well mixed. Start to add drops of water up to the point you feel that the mix is smooth enough to be used as a spread or dip. Enjoy!

Wednesday, October 27, 2010

Second Helping: Apple Pomegranate Salad with Tarragon Dressing

101015_CPE_apple salad4_web

If you're unfamiliar with pomegranates, prepare to fall in love. They have a reputation for being hard to eat, but that's nonsense. Simply score the leathery outer skin, peel it open, and gently remove the gorgeous red arils from the bitter membrane. You can do this over a bowl or by immersing the fruit in water, which helps separate the membrane bits. (For a great pictorial of this method, check out this post at Wit & Whistle.)

101016_CPE_apple salad7_webSome people chew the arils and spit out the seeds, but I don't. I like the crunch, and spitting out those tiny seeds takes a lot of the fun out of the experience.

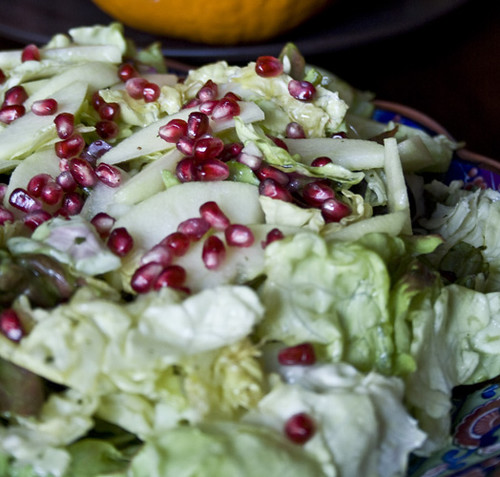
This fall salad came together at the farmer's market, where I find more affordable organic produce. Organic apples at $2 a pound, a head of organic red butter lettuce, a beautiful deal on pomegranates (three for $1!), tarragon from my garden -- and this salad was had for a song.

The dressing worked a miracle in my house. My older son, who has never eaten lettuce, happily ate three servings of greens. We used the dressing to season purple cauliflower for roasting the next day -- yum!

Tip: If the high price of organic food puts you off, check out the Environmental Working Group's Shopper's Guide to Pesticides. Available as a pdf or iPhone app, it identifies the "cleanest" produce and the "dirty dozen" to help you choose when to go organic.

Apple and Pomegranate Salad with Tarragon Dressing

101015_CPE_apple salad1_web
Soaking the apple slices in acidulated water -- with lemon juice or vitamin C -- keeps them from browning. Leftover dressing will keep at least a week or two in the refrigerator.

2 to 3 apples, peeled, cored and sliced
2 vitamin C tablets, crushed, or 1 to 2 tablespoons lemon juice
1 head of butter lettuce or other greens
3 tablespoons pomegranate arils

Tarragon Dressing:

1/3 cup apple cider vinegar
2/3 cup olive oil
2 tablespoons honey
1 tablespoon fresh tarragon, chopped
salt and pepper to taste

In a small bowl, stir together crushed vitamin C tablets or lemon juice with water. Peel, core, and slice apples, then immerse slices in water bath for a few minutes to reduce browning. Drain.

Combine the dressing ingredients in a jar and shake to blend. Combine greens and apples in a large bowl; drizzle dressing over and toss to combine. Top salad with pomegranate arils.

Monday, October 25, 2010

The Kids Cook Monday: Smokey Dill and Cheese Muffins

My grandma always insisted that soup was the best thing on Earth. The way she found to convince me to eat all contents from that huge white porcelain bowl was to bring something delicious as a side: Sometimes it was just plain fresh roll from her favorite bakery to be covered with butter. Other times one of her creative appetizers was there, something like stuffed cheese and ham filled potatoes.
So, for today's part of the campaign The Kids Cook Monday, here's one more way to enjoy the arrival of rainy days,and give hearty stews and soups a good company: a delicious savory muffin. The delicate dill touch enhances the smokey touch from the turkey ham. When the mix of cheeses melts inside, it create a unique texture to this impossible-to-stop-eating muffing.


Smokey Dill and Cheese Muffin
If inspired to have kids helping you, the opportunity is fantastic. They can help measuring and mixing and also chopping ham. One popular activity with the 3 years old kids is to spray the muffin pan or cups with oil.

1 cup turkey smoked ham, chopped
2 cups unbleached all -purpose flour
1 tablespoon sugar
2 teaspoons baking powder
1 teaspoon salt
1 1/2 teaspoons garlic powder
4 teaspoons dill
1/2 cup Parmesan cheese
1 cup lite cheddar and jack cheeses, shredded
1 egg
1/2 cup nonfat milk
1/2 cup non fat yogurt
1/2 cup canola oil

Pre-heat oven to 400 F. Stir fry smoked ham in a hot skillet and set aside. Mix all dry ingredients in a bowl. In another bowl whisk egg with milk, yogurt and oil.  Pour the wet mix into the dry bowl gradually. Add ham, and mix the batter slowly. Bake in a greased muffin pan (or muffin cups) for about 25 minutes. Yields 12 muffins.

Friday, October 22, 2010

And the winner is...

Thanks for all the well wishes on our anniversary! We hope you're enjoying the Halloween treats in Spook Play Explore, along with the scores of recipes we've shared here in the past year.

The lucky winner of the Amazon gift card, according to the random number generator, is ... Alora! Congratulations, Alora -- we'll e-mail you to make arrangements.

(By the way, to those of you who have trouble posting comments: Thanks for your patience. I've been trying to identify what the trouble. We're not the only ones on Blogger with that problem, but the solution remains elusive. I haven't given up yet, though!)

Wednesday, October 20, 2010

Lunch Box Pumpkins, plus Giveaway Closing!

101020_CPE_minijackPlanning a Halloween party menu, I was looking at friend's setting of Halloween snacks with a clementine "pumpkin" on the side.

A light bulb flashed.

I got out my Sharpie, and in seconds turned two clementines into jack o'lanterns, just the right size to tuck into the day's lunch boxes. If you aren't afraid to arm children with permanent marker, a bowl of clementines and some Sharpies could make for an easy party activity.

For more fun Halloween ideas, take a look at our collection of treats, Spook Play Explore, available as a free download. Today's your last chance to enter to win a $25 Amazon gift card! Leave a comment on our anniversary post from last week before midnight PST for your chance.

Monday, October 18, 2010

The Kids Cook Monday: Monster Treats

100903_CPE_monster treats_1We had almost as much fun coming up with silly descriptions for these as we did making these fun nibbles for The Kids Cook Monday -- part of the Healthy Monday campaign. They're one of the creepy treats featured in our free e-booklet, Spook Play Explore. If you haven't snagged your copy, click here or the link to the right to get your free copy. And don't forget to enter our Amazon gift card giveaway before Wednesday!

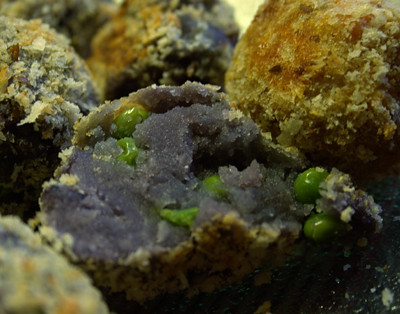
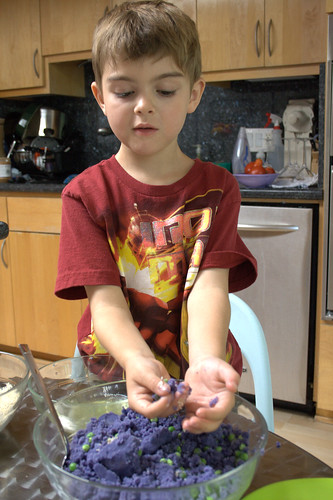
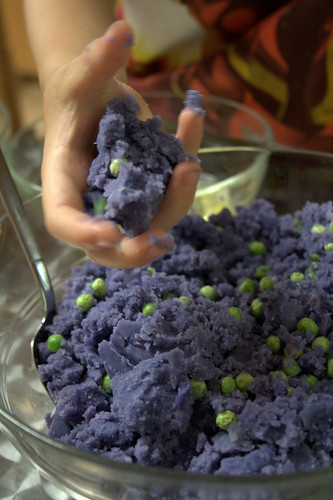
Monster Treats gave my son the most leeway in sharing them with friends: They could be special treats for monsters, or special treats made out of mashed-up monsters. (The peas, of course, are monster boogers.)

Nondescript on the outside, these treats break open to reveal vibrant purple and brilliant green. For an even more colorful presentation, pair these with a batch of Sweet Potato Nuggets.

100903_CPE_monster treats_small

Monster Treats

We liked the combination of bright green peas with deep purple potatoes, but you can mix in almost anything you like. You can use leftover mashed potatoes to speed up prep time.

100903_CPE_monster treats_4
2 pounds purple potatoes, peeled and cooked
2 teaspoons butter
salt and pepper to taste
1 to 2 cups frozen peas
2 egg whites
1 1/2 cups bread crumbs (I mix regular bread crumbs with panko)

Combine potatoes, butter, salt and pepper in a large bowl and mash with a fork or masher. Stir in peas. Refrigerate until well chilled.

Put egg whites in a shallow bowl and stir briefly with a fork or small whisk. Put bread crumbs in another shallow bowl.

To form treats, scoop up a tablespoon or so of the potato mixture and shape into a nugget or ball. Dip into egg white and then into bread crumbs.

To freeze: Arrange nuggets on a plate or pan and set in the freezer for a few hours. Store frozen nuggets in a sealed freezer bag; take them straight out of the bag to bake.

To bake in the oven (my preferred method): Preheat oven to 400 degrees. Set nuggets on a parchment-lined baking sheet and spray lightly with olive oil or cooking spray. Bake for 20 minutes or until nuggets are lightly browned and crispy.

To pan-fry: Lightly spray a non-stick pan with olive oil or cooking spray. Cook nuggets over medium heat for a few minutes on each side until lightly browned and crispy. (You can also fry them in oil.)

Friday, October 15, 2010

Playdate Special: Little Monsters Homemade Granola Bars

The boys measured all irresistible and delicious ingredients. They grated nuts and dried fruits, chose the granola mix,  and blended it all. Finally they ate the final result in the same playdate! Weeks before  they also designed the labels of their "Little Monsters" brand and could share the bars during a awesome camping trip with friends to Portola Redwoods Park.
Hooray - one day those delicious home made bars will be my treat to kids at Halloween.
But before I get to excited about this idea - and delirious-, about this possibility - let me share something else with you. This is the first recipe to celebrate the beginning of our second year online.
If you didn't have time yet to celebrate with us, don't forget to leave a comment at our anniversary post- you can be the lucky winner of a U$ 25 Amazon Card. Also, as a "goodie-bag" we are sharing a free e-booklet Spook Play Explore on the upper right of the screen. You just download it and have a collection of healthy soups and yummylicious treats.


Little Monsters Granola Bars

Adapted from Mark Bitman's Apricot Almond Granola Bars

1/2 cup almond butter
1/2 cup honey
1 teaspoon vanilla extract
1 cup crispy brown rice cereal
1 cup your favorite granola mix
1 cup your favorite nuts and dried fruits mix (we used macadamia, cranberries, pineapple, almonds and cashew)
1/4 teaspoon salt
Canola oil for greasing
½ tsp cinnamon
2 tablespoons fine unsweetened dried coconut 

Invite the kids to measure and mix the dry portion of the bars: crispy rice cereal, granola, mix of fruits and nuts, salt, cinnamon and coconut. In our playdate,  we used a Progress nut chopper to grind nuts and fruits, which was a great challenge for them. Brush a baking dish or cookie sheet with oil and line it with plastic wrap. Melt almond butter, honey and vanilla in a saucer over medium heat for long enough to have all ingredients mixed into a paste, stirring it all with the help of a wood spoon or whisker. Add the wet paste to the dried ingredients and stir. Spread the granola mix evenly with the help of a spatula, and cover it. Refrigerate for at least one hour or more to achieve the ideal texture. Once ready, the bars will look like the ones from the packages. Remove the plastic film and cut the bars into any length and shape you like.

Wednesday, October 13, 2010

Anniversary presents -- for you!

We are thrilled to be celebrating our one-year anniversary this month! We're so excited, in fact, we're offering two giveaways this week.

Everyone's a winner in the first: We've compiled 10 of our favorite recipes for Halloween celebrations in a free e-booklet, yours for the taking!

This free collection -- Spook Play Explore -- includes a few special treats that aren't yet available on the site, such as the Ghosts and Creepy Crawlers Coconut Treats pictured here. Click here to get your copy, or click the link to the right.

Our second giveaway is a $25 Amazon gift card. To enter, please leave a comment on this post by midnight next Wednesday, Oct. 20. (We know some folks have had trouble submitting comments; if that's the case for you, please click here to send us an e-mail.) We'll randomly draw a number and announce the winner over the weekend.

Thank you all for your support and encouragement! We've surprised ourselves: The Cook Play Explore recipe box is bursting with original recipes (172 and counting), and more than 1,000 wonderful people have subscribed to the blog. Thank you for joining us on this adventure.

We hope you enjoy Spook Play Explore, and don't forget to leave a comment for your chance at an Amazon gift card!

Wednesday, October 6, 2010

Make It With Milk: Mascarpone

100918_CPE_mascarponeWe've made yogurt, and we've made butter. Don't you think it's time for a treat? The latest in our occasional series on cool stuff you can make with milk is decadent mascarpone.

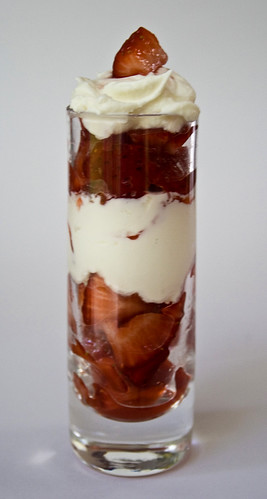
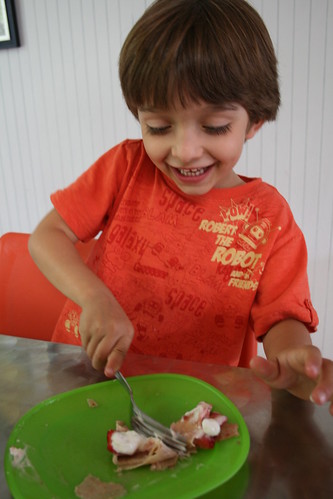
Fresh, rich mascarpone is best known in tiramisu, but it's beautiful in all sorts of sweet and savory dishes. It's a rich finish for a homemade pasta sauce, a heavenly companion to fresh fruit, a willing partner to stronger cheeses for a delicious spread. You can use it to make our Hands-On Gnocchi or Popeye Sauce ... or eat it straight with a spoon. Or your fingers. We enjoyed it in strawberry-topped crepes, then in strawberry-mascarpone parfaits.

My older son swooned over it; the younger one wouldn't even try it, but he doesn't like whipped cream either. (I hope he'll outgrow the condition.)

This is deliciously simple, perhaps 15 minutes total hands-on time. But it does take time for the magic to work -- up to 24 hours. Tartaric acid may be hard to find, but if you love mascarpone, it's worth tracking down (try online shops, brewing shops, or earthy-crunchy stores). You'll have plenty left over to make this again and again and again.

Mascarpone

100917_rootbeer_12
This yielded just over 9 ounces of mascarpone. Tartaric acid is available at beer- and wine-making supply shops, and online (try the New England Cheesemaking Supply Company). It is not the same as cream of tartar! Also, avoid using ultra-pasteurized milk products here. Pasteurized is fine; ultra won't work well. This is drawn from several recipes floating around the Interwebs, but relies most heavily on Fankhauser's Cheese Page.

1 pint half-and-half
1 pint heavy cream
1/4 teaspoon tartaric acid (see Note)

Combine half-and-half and cream in a pot and heat to 180 to 185 degrees. Dissolve the tartaric acid in a tablespoon of water, then stir into the heated cream mixturey. Keep the cream at 180 to 185 degrees for 5 minutes, stirring occasionally. It should start thickening a bit.

Put the cream in the refrigerator in a covered container (I keep it in the pot) and let it cool thoroughly (I leave it about 12 hours).

Line a fine-mesh strainer with clean muslin, cheesecloth, or a coffee filter and set it over a bowl. Pour the thickened cream into the strainer, cover, and let it sit in the refrigerator for at least 12 hours until the mascarpone thickens to the consistency you want. Store the finished mascarpone in a covered container and use soon. Some people say you need to eat it in a day or two; others say a week. Use your judgment.

Monday, October 4, 2010

Kids Cook Monday: Beef, Spinach and Mushroom Pockets


This recipe has a very specific inspiration: the Syrian-Lebanese sfihas served in Rio de Janeiro. Traditionally in their original source, they are made with ground lamb, but the popularity of those delicious morsels - as easy to prepare as to eat -  was so big that after crossing oceans and generations they ended up being adapted and now have all different fillings.  They may be stuffed with ground beef, green collards, and even some kind of ricotta cheese. Sfihas might be also found with different types of dough and shapes. But the one I can't forget was a perfect triangle, and each bite of it made my mouth be full of water .
That said, I can now indulge on something else. As a recipe that is beyond an adaptation. A free-short-cut and free-style interpretation of sfihas. And a very easy one, so that I could invite the kids to cook with me. Kids helped to roll and cut the dough and even wrap their beef in diverse shapes. The result was delicious. And the now are asking me if this is going to be a regular Monday dinner!
Spinach and Mushrooms Beef Pockets
Those can be prepared ahead time and par-baked. I followed the instructions for my favorite whole wheat pizza dough sold at TJ - about 10 minutes at 450 F, and you can leave a bit less to end baking later or the next day. A possible vegetarian/vegan alternative for this recipe is to work with firm tofu instead of beef. 

1 tablespoon extra-virgin olive oil, and plus to garnish and spray on the top
1 pound ground beef (15% fat maximum is great, I used grass-fed organic ground beef)
Kosher salt
1 cup finely sliced crimini mushrooms or baby Portabella
1 cup spinach, chopped (fresh or frozen)
1 teaspoon ground allspice
1 package of fresh pizza dough
More olive oil, to be sprayed with a mister
Z'aatar (more about it here)  or sesame seeds to be sprinkled on the top


Start up with the filling: Heat olive oil in a pot. With high heat on, add beef and fry it up to when it is almost totally cooked. Turn heat to medium, adding mushrooms and spinach. When all is cooked (mushrooms still al dente) get rid of the liquid collected on the bottom of the pot. Add allspice. Simmer for about 15 minutes, stirring to get all juices in the mix.
In the meantime, turn the oven to 450 F. Sprinkle a baking sheet with some whole wheat flour or corn flour and spray a thin layer of olive oil over it. Roll the dough and cut all shapes that kids (or you) like. Transfer the dough pieces to the baking sheet. With the help on one spoon, put beef filling over pieces of dough, and close the parcels as you like. You mary roll, wrap the contents on a rectangle or triangle shape or just in a pocket style. You can invite kids to both of those parts of the process. Spray olive oil and sprinkle za'atar or sesame seeds on the top of each morsel. Add some couple more minutes to the time recommended by the dough package or your recipe if you are using home made dough. Garnish with a stream of olive oil around the pocket and some more spices if you love them. Enjoy while it is still hot. 

Monday, September 27, 2010

The Kids Cook Monday: Sweet Potato Nuggets

For today's The Kids Cook Monday post -- part of the Healthy Monday campaign -- I've got one of our favorite vegetables: sweet potatoes.

100903_CPE_croquettes
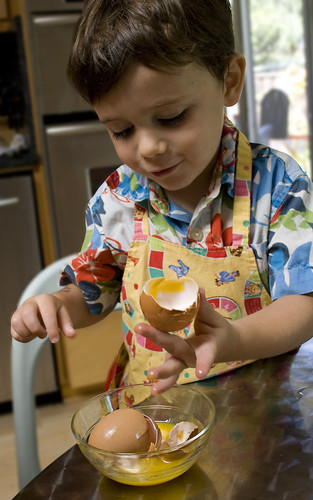
Cracking eggs is a tough skill to master, but so much fun
They're full of flavor and, as Anna wrote last week, packed with beta carotene (and fiber!). We love them roasted with other root vegetables, or sliced up as oven-baked fries.

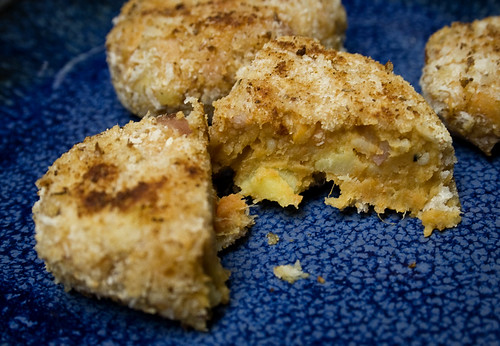
Another fun way to eat them is in the form of croquettes. A fancy term like that makes my kids suspicious, so we call them potato nuggets. My boys wouldn't touch mashed potatoes -- but a crispy breaded coating makes all the difference. You can mix in almost anything your kids might like (a great way to use up leftovers) then bake or pan-fry them. They freeze well, too, making them a great homemade "fast food" for busy days.

Kids who don't mind getting their hands dirty will have fun making these. My 3-year-old picked chicken-and-apple sausage as his mix-in, and handled everything from cracking eggs to squishing nuggets into shape and coating them with bread crumbs.

CPE_croquette_cut

Sweet Potato Nuggets

This is a very basic recipe you can adapt to suit your taste. Choose deep orange sweet potatoes for maximum nutrition -- and fun.

2 pounds sweet potatoes, cooked and peeled (see note below)
1 teaspoon butter
salt and pepper to taste
optional add-ins: curry powder, chili powder, chopped meat, chopped chives or green onions, parmesan cheese
2 egg whites
1 1/2 cups bread crumbs (I mix regular bread crumbs with panko)

Combine sweet potatoes, butter, salt and pepper, and any spices in a large bowl and mash with a fork or masher. Stir in any extras, such as chopped meat or herbs. Refrigerate until well chilled.

Put egg whites in a shallow bowl and stir briefly with a fork or small whisk. Put bread crumbs in another shallow bowl.

To form nuggets, scoop up a tablespoon or so of the potato mixture and shape into a nugget or ball. Dip into egg white and then into bread crumbs.

To freeze: Arrange nuggets on a plate or pan and set in the freezer for a few hours. Store frozen nuggets in a sealed freezer bag; take them straight out of the bag to bake.

To bake in the oven (my preferred method): Preheat oven to 400 degrees. Set nuggets on a parchment-lined baking sheet and spray lightly with olive oil or cooking spray. Bake for 20 minutes or until nuggets are lightly browned and crispy.

To pan-fry: Lightly spray a non-stick pan with olive oil or cooking spray. Cook nuggets over medium heat for a few minutes on each side until lightly browned and crispy. (You can also fry them in oil.)

Note: To cook sweet potatoes, wash them well and prick them with a fork. Rub with oil and bake in a 400 degree oven for 30 to 60 minutes or until soft. Or set on a white paper towel in the microwave and cook on high 12 to 18 minutes for four potatoes. Or cut peeled potatoes in 1 1/2-inch chunks and cook in a pressure cooker for 5 minutes.

Sunday, September 26, 2010

Finding Love for Vegetables

080711garden harvest06
Harvesting chamomile among the garden veggies

The New York Times just reported on an interesting study by the Centers for Disease Control and Prevention that found Americans aren't eating their vegetables. A quarter of us don't eat veggies three times a day, and all together we're eating half the vegetables health experts recommend.

I certainly struggle: I expect my kids to eat their veggies, even to crave veggies, but I certainly don't model that kind of enthusiasm. The problems the NYT article points out -- particularly the time needed to prep fresh vegetables -- resonate in my home. The kids don't mind vegetables; it's the grownups who tend to dismiss them.

My family has been trying to put vegetables more front and center in our lives and on our plates. We converted a good amount of our tiny yard into a garden, and the edible plants -- which grow with little attention from me beyond watering -- are now spilling over into our front yard. I take one of my boys to the farmer's market each week, and the kids help choose the week's produce. We have more meatless meals. But when we're pressed for time, vegetables are the first thing to get cut from our meals. And they're an afterthought at snack time.

I'm acutely aware that I'm lucky to be able to offer as many good vegetables as I do, and that it still isn't enough. I have enough land and time to grow a modest garden, learning as I fumble through the seasons. I have time to go the farmer's market, and a child who makes the outing easy to manage. The veggies at the market are fresher, taste better, and are cheaper than what I find at the grocery store. I love that food stamps can be used at the farmer's market, but there's still the challenge of finding time for a market visit, getting there, and prepping all that fresh stuff.

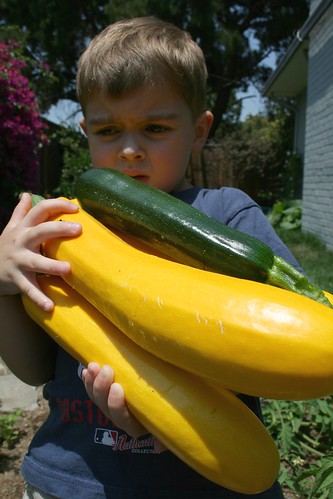
080629zucchini2The idea of vegetables as "high art," as the Times article puts it, spells big trouble. Snobbery when it comes to vegetables is ridiculous -- and yet I worry I'm adding to the problem when I write here about an unusual vegetable that might be unavailable at a big-box grocery store, or hard to find outside my small corner of the world.

I was happy to see results of another study looking at Alice Waters' Edible Schoolyard program: "Students who gardened ate one and half servings more of fruits and vegetables a day than those who weren’t in the program." You might have seen early this year the Atlantic Monthly's overwrought essay excoriating the program as a detraction from the education of our kids. A schoolyard garden isn't going to solve all the woes of our educational system, but I find it impossible to argue with teaching children how to grow, prepare, and enjoy their own food. You can of course tie in math, botany, reading, and more, but frankly I'm happy enough to see kids learn a bit of self-sufficiency and indulge their curiosity.

We're a month into the school year, and the most excited I've seen my first-grader has been when he's telling me about the bean-growing experiment his class is conducting, and his visits to the school garden. While I can't get him to help in our home garden, at school he was thrilled to nibble on raw zucchini, sample midget cantaloupe and yellow watermelon, and plant seeds for the winter growing season. He learned that while he doesn't care much for the big, thick broccoli stalks common at stores, the slender home-grown broccoli is pretty tasty. I agree -- so I've tucked some broccoli seeds in our small garden.

Small, simple steps.

Does your family eat enough vegetables?

LinkWithin

Related Posts Plugin for WordPress, Blogger...