Thursday, March 31, 2011

Tapioca Flour Sticks


Once upon a time, a long time ago, when I thought I would never be able to bake well,  someone told me that making "biscoitos de polvilho" was a impossible mission. One of my grandma's friends told me that I had to have lots of patience and time. And sometimes even some good luck.

On a wet Tuesday afternoon that seemed to be what I had: Time, patience, tapioca flour (from Bob's Mill)  and luck to be in the mood to bake.  I thought that maybe the four boys would get interested to play with the supposed to be very gooey mix - something like white glue papier machê- and make shapes with them while squeezing the dough out of the bag.

It didn't happen. But the three of them couldn't stop eating the crunchy, savory and irresistible sticks as they came straight from the oven. Darienne was the perfect partner to make those crazy shapes.
This recipe is adapted from the original by Dona Maria José da Silva, a Brazilian wise lady who specializes on making all sorts of baked goods, from crackers to cookies.
During the whole process I was puzzled by the texture of the batter, and even dared to play with some ingredients, adding less milk than recommended and jazzing it up with some spices. The result was great. On the next day, best friends arrived from Brazil for a short visit - and were happy to try those,  which were served as a starter for a very long and delicious lunch.

Tapioca Flour Sticks (Biscoito de Polvilho Seco) 

You can store in a sealed plastic bag for about a couple of days. This recipe makes about 100 sticks or less, depending on how wide is the cut you make on the tip of the plastic bag. 

4 1/2 to 6  cups tapioca flour
1 cup canola oil
1 tablespoon kosher salt
1 cup boiling water
1 large egg, beaten
3  to 4 cups of milk
1 teaspoon garlic (optional)
1 cup Parmesan cheese (optional)

Pre-heat oven to 390 F. In a very large bowl, mix tapioca flour, salt, oil and cover the ingredients with boiling water. Stir with a wooden spoon. When cool enough to the touch, start kneading the mix with your hands. When the mix is looking even - but coarse - add egg and then milk little by little, using your hands to mix. If it gets too liquid, keep adding more flour up to when it looks like it's going to keep a texture to be squeezed from bag.You can add the garlic and the Parmesan after baking half of a batch without them, so to taste the whole tapioca as it is. Transfer fair amounts of batter to a plastic bag and make a small hole in it. Line baking sheets with silicone liner and distribute the stripes of dough in the manner you wish. Bake the sticks for about 20 minutes or more, up to when golden. Let them cool down for a while and enjoy!

Thursday, March 24, 2011

Crocodile's Fool Banana Bonbons


So, what if a kid-crocodile wakes up in the mood for eating a child?

Maybe he will have a banana. Maybe he won't eat anything!

Right? Maybe. Here's a big thanks to this creative writer, who wrote this quirky and hilarious book that may raise your kids' appetite for a banana or banana inspired recipe! Or maybe, really, anything edible to make him/her to grow up.

This is one of my kid's favorite book. I'd Really Like to Eat a Child, by Sylvianne Donnio, was given by Darienne to one of my kids, two years ago, as a birthday gift. They always have a blast reading it. And when I am upset by their sporadic hunger strike (yes, believe me, they all do have a period to refuse to eat), this is the book I read to my kids.

So, last time I was looking for inspiration for the Cooking Club at school, I found it in this story. The initial idea was to make some healthy bites that would include banana and other ingredients to make a kind of surprising "candy."

The first time we tried to develop the recipe was during our playdate with our four boys. They again enjoyed listening to the story, read by Darienne. After that we all played with making the dough, and coating the little balls with chocolate sprinkles, white chocolate chips, and even rice crisps. Some thought the mix was too gooey and baby food-like. Others enjoyed the whole process and the product.

At school, for the Cooking Club,  I added another step to the recipe: with a toy hammer, kids had the chance of smashing a bag full of vanilla wafers to turn them into crumbs. We also swapped the original extra cup of oatmeal for nice, crisp granola. This gave more texture to the bonbons so that we didn't even have to bring them to the fridge to make them firmer. Some kids just couldn't eat enough of them. Others, just like the crocodile with his bananas, were not so enthusiastic about the final product. But they all enjoyed using the hammer and imagining if we would fool the crocodile with our banana bonbons.

Banana Bonbons

Good reviews may come even from the kids who don't care for bananas. You can play with it as well -- nuts might be a wonderful addition, as well as any kind of dried fruit.
1 1/2 large or 2 medium ripe bananas
1 cup quick oatmeal
1 cup your favorite granola
2 tablespoons dulce de leche (cooked condensed milk) or nut butter
1 cup crushed vanilla wafers, in crumbs (I used Trader Joe's brand, which is free of high-fructose corn syrup)
1 tablespoon raisins
1/4 teaspoon cocoa
1/4 teaspoon cinnamon
For rolling and topping:
Shredded coconut, toasted or not
Chocolate sprinkles
Chocolate chips, to put on the top of bonbons.

Mash bananas with the help of a fork. Kids can help with that process. After , they will love to crush the vanilla wafers inside a plastic bag, using a meat hammer or even a plastic toy hammer. Mix everything to an even  texture and roll in the covering of your choice. Cool them in freezer for about 15 minutes to firm texture, if needed. Enjoy! (... And save some for Achilles, the kid-croc...)

Tuesday, March 22, 2011

Spring Pea Dip

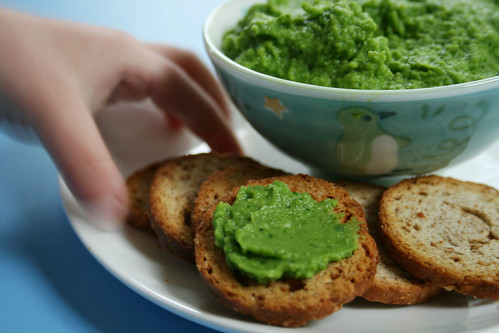
110315_springdip2


The kids didn't go for this easy, healthy dip. They're crazy. Just meant more for me, and I couldn't stop scooping it up. Peas, an added boost from spinach, a burst of lemon, and a kiss of nutmeg -- yum! This looks and tastes like spring to me.

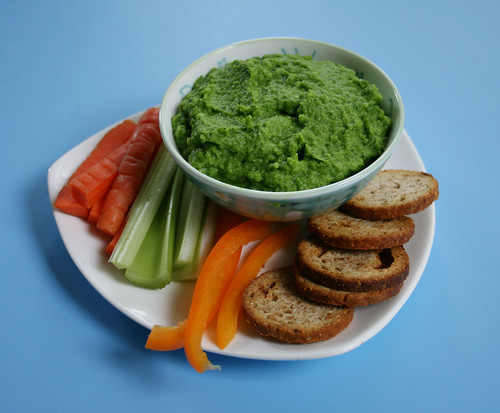
Set this out as a dip for raw veggies, slather it on Melba toast, or spread it in a pita as a base for a veggie sandwich. It takes just a few minutes to whip up.

110315_springdip1


Spring Pea Dip

To play with the flavor, try adding a handful of fresh herbs -- mint, cilantro, or parsley would work nicely.

2 cups peas, frozen or fresh
1/2 cup water
generous handful of baby spinach leaves
2 tablespoons grated Parmesan cheese
1 tablespoon olive oil
2 teaspoons lemon juice
1 teaspoon lemon zest
a pinch or two of nutmeg
salt and pepper to taste

Combine water and peas in a saucepan. Bring to a boil, cover, reduce heat, and cook for 5 minutes. Strain peas, reserving cooking liquid.

Combine peas and remaining ingredients and blend thoroughly in a food processor or blender. Add a tablespoon or more of the cooking liquid and keep blending until you reach the desired consistency.

Serve dip with fresh vegetables, bread, or crackers.

Wednesday, March 16, 2011

Shamrock-ish Shake

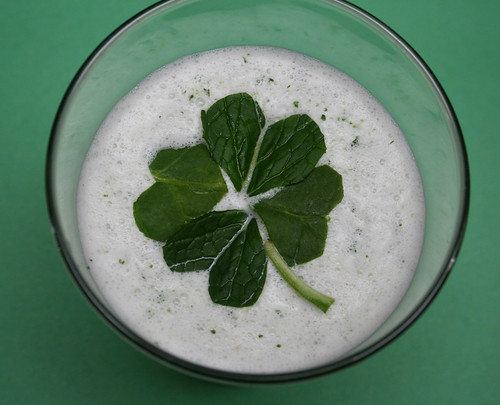
110315_shamrockish1

I'm not above taking my kids to the Happy Meal Place now and again, or indulging them in a Shamrock Shake. I am, however, above taking them for a lot of Shamrock Shakes. We whipped up this homemade version using fresh mint for natural flavoring. We even threw in a bunch of spinach, knowing full well that a dose of leafy greens doesn't magically make this healthy. It does, however, help us feel a little better about it.

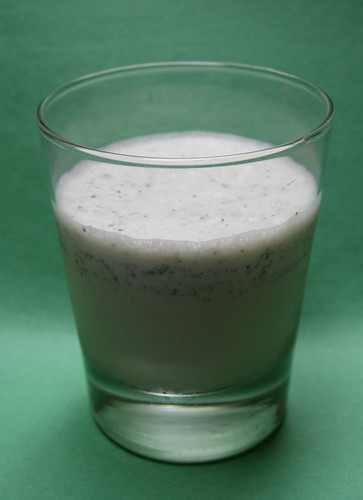
110315_shamrockish2You can forgo the spinach, if you wish, but it's a fun way to play with veggies. For the record, I don't advocate hiding healthy stuff in kids' food, though I understand and appreciate why some parents do it. If your kid is open to experimentation, let her toss the leaves into the blender and taste the results. My older son, for example, hates spinach, but he loves making Brainy Brownies precisely because of the spinach and blueberry puree -- he thinks it's neat those ingredients can disappear so completely.

Shamrock-ish Shake

Feel free to green this up with a bit of food coloring. If you're short on time, skip the steeping part -- but add more mint leaves to the blender.

2 cups low-fat milk, or 1 1/2 cups milk and 1/2 cup half-and-half
1 bunch fresh mint, divided
2-3 cups vanilla ice cream
1 generous handful of baby spinach

Warm milk (and half-and-half, if using) in a saucepan over medium heat, stirring, until mixture begins to steam. Remove from heat, stir in half of mint, and let steep in refrigerator at least two hours or up to overnight.

Pour milk-and-mint mixture through a fine-meshed strainer into a blender. Add 2 cups ice cream, spinach, and a handful of mint leaves and blend to combine. Add more ice cream if mixture is too thin. Taste and add more mint if desired. Makes 2 to 3 drinks.

Tuesday, March 15, 2011

Mint Chocolate Panna Cotta

110315_mint-choco-panna-2

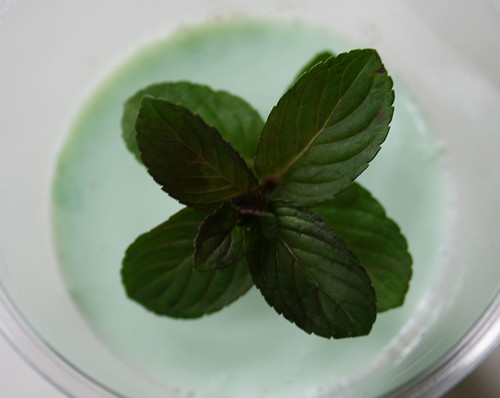
Fresh mint pairs with a touch of chocolate in this slightly sweet panna cotta for St. Patrick's Day. It comes together easily, though you need to be careful to time the steps. Allow at least 8 hours of chilling time -- you might want to make it a day ahead. I took the classy route and prepared mine in clear plastic cups. You might want to up the fancy factor and prepare this in wine glasses or ramekins. Dip the container in hot water for a few seconds to loosen and unmold, if you dare. (I have no talent for releasing puddings from molds, so I'm sticking with the plastic cups.)

Mint Chocolate Panna Cotta


I mixed equal amounts of milk and half-and-half, but you can substitute with heavy cream, full-fat milk, or your own blend if you wish. Serves 4 to 6.

1 1/2 cups low-fat milk
1 1/2 cups half-and-half
1 package gelatin, divided
1 ounce chocolate, chopped
1/4 cup sugar, divided
handful of fresh mint leaves
green food coloring (optional)

Pour one cup of milk into small a saucepan. Sprinkle half the gelatin -- about 1 teaspoon -- over milk and let sit for 5 minutes. Warm milk and 1/2 of gelatin over low heat, stirring to dissolve completely. Add 1/2 cup of milk, 3/4 cup of half-and-half, and 2 tablespoons sugar, stirring, over medium heat until mixture begins to steam. Remove from heat and thoroughly stir in chocolate pieces. Pour mixture through a fine-mesh sieve into a bowl. Divide chocolate mixture among 4 to 6 glasses. Refrigerate for 4 hours.

Combine remaining 3/4 cup milk and 3/4 cup half-and-half in another saucepan and heat, stirring, until mixture begins to steam. Add mint leaves and let steep in refrigerator while chocolate layer sets.

Once chocolate layer is nearly set, strain mint mixture into a saucepan. Sprinkle remaining gelatin on top and let sit for 5 minutes. Then add remaining 2 tablespoons of sugar and warm, stirring, over medium heat until mixture begins to steam. Stir in green food coloring, if using. Let cool in pan for 40 to 60 minutes. When cooled to room temperature, pour mint mixture evenly over chocolate layer and chill for four hours.

Garnish, if desired, with mint sprigs, chocolate shavings, chocolate chips, or whipped cream.

Thursday, March 10, 2011

Cardamom Cinnamon and Vanilla Bean Rolls


It all started when we were at Ikea. The smell coming from the little café made everybody to crave for cinnamon rolls. One week later, the boys wanted to bake some. I was clueless and not willing to wait and test recipes, and ended up buying a "ready to bake" frozen dough from Trader Joe's. Finally, a good recipe of Cinnamon Pinwheels was brought by one of the other mothers who cooks with me and the kids at our school's Cooking Club.
Weeks in a row we baked a very fast to prepare, very silky dough, and the kids were all marveled by the possibility of sharing that recipe with their parents. We were so thankful to Asma, who showed to us how easy was to make them.
For our playdate I twisted a little bit her recipe and added Darienne's favorite spice, cardamom. My sisters were visiting, and they just absolutely love vanilla. So, there went some vanilla beans in the dough. And as my attempt was to have some more nutrition, I substituted the all purpose flour to wheat. The reviews were mixed: while I thought that the fluffiness of the original recipe was missing, the crunchier surface was wonderful, and the flavors added were all there, blended and filling our home with a wonderful smell of a good bakery.


Cardamon Cinnamon and Vanilla Bean Rolls

Dough
1 1/2  + 4 tablespoons cups of wheat flour (2 cups for normal flour)
4 teaspoons baking powder
1 teaspoon salt
1/2 cup butter at room temperature
1 cup 2 % milk (or buttermilk)
1/2 teaspoon vanilla beans

Filling
1/3 cups butter, melted
1 cup packed brown sugar
1 tablespoon cinnamon
1 teaspoon cardamom
1 teaspoon vanilla extract


Pre-heat oven to 425 F (220C). Combine flour, baking powder and salt in a large bowl. Smash butter with a fork, with the other ingredients to the point of a  coarse texture. Add milk to dry ingredients and stir with the fork until a soft dough is formed. If this is too wet, add more flour. Turn dough onto lightly floured surface and knead gently up to when it feels silky and not sticky to your hands (might be something in between 8 to 12 times of kneading). Roll pastry into a 12 inch square. Melt butter in the microwave . Add sugar, cinnamon, cardamom and vanilla extract up to when all ingredients are combined. Spread sugary mix on stretched dough from edge to edge and roll it like a jelly roll. Seal edges. Cut into approximately twelve 1 inch pieces ( I ended up always cutting about 0.5 inche and the result was a drier yet crunchier roll).  Place in lined or greased baking sheet.  Bake for about 14 to 20 minutes or up until golden. Serve warm. We paired them with a delicious fruit salad with blood oranges. Yum!

Wednesday, March 2, 2011

Tips & Gadgets: Grow Your Own

IMG_1197

The single thing that has most influenced the way I cook is outside my kitchen: the garden.

I'm not a great gardener. Before settling into a home with a small yard a few years back,  my track record with plants wasn't so good. I even killed off mint. Most gardeners would tell you that's impossible.

Yet in the past three years, I've harvested enough eggplant, tomatoes, and zucchini that I've had to give some away to passersby. I grow dozens of herbs that inspire my cooking year-round. I'm constantly trying to carve out space in my tiny yard to cram in another edible plant.

If you've been toying with the idea of growing your own food but haven't yet given it a try, this is the time to get started! It isn't hard.

My garden is not one of those neat, trim, adorably idyllic gardens. Mine always has a large, brown, withered dead thing that should have been pulled out weeks ago, a brash plant sprawling across neighboring plots because I haven't bothered to prune it, and in the middle of it all at least one or two gorgeous, healthy, bountiful plants rising above the chaos.

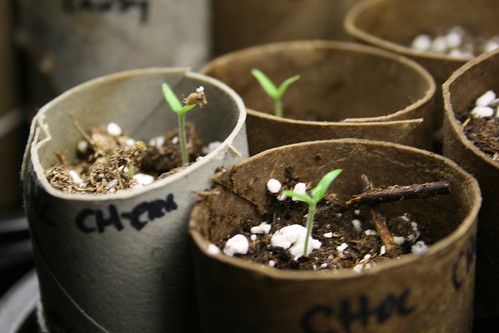
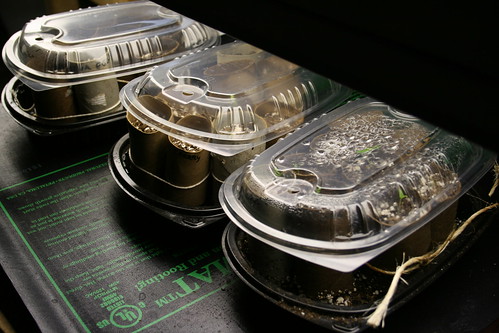
IMG_1195The successes have been encouraging enough that I bought a cheap heating mat for seedlings and a shop light on a timer. They're set up in the garage, where my summer garden is sprouting in recycled toilet paper tubes and takeout containers. Come April, the survivors will make their way outdoors.

A few tips:

Organic can be cheap. You pay a fortune for organic produce at the market, but it's a bargain to grow at home. No need to invest in expensive, organic fertilizers. Pick a few solid, all-purpose helpers (I use fish emulsion for fertilizer and neem oil for pests), and supplement with cheap tricks, like fashioning 2-liter bottles into cloches, or toilet paper tubes into seed pots. Even cheaper, don't do much of anything: Toss some seeds in a sunny spot, add water, and cross your fingers. Painless.

Don't forget flowers. Mixing in easy-to-grow flowers with your edibles is a great way to draw beneficial bugs to the garden, and to make working in the garden more fun.

Include the kids. I envisioned playing in the dirt alongside my kids, poking at worms and marveling at seedlings. Never happened. But my kids do help choose what we grow, and they help harvest. The in-between work... not so much.

Just do it already. You don't need the perfect setup, adorable pots, or magazine-worthy landscape design. Pick something easy that brings you great pleasure, find a bit of dirt somewhere, and give it a go.

My favorite resource for gardeners just getting their feet dirty is the You Grow Girl website. Gayla Trail's site and books are great primers for newbies and mediocre gardeners like myself. Check them out at your local library for some inspiration.

Herbs are my favorites. They're generous and forgiving, and I no longer waste money on packaged bunches that liquefy in the fridge. My other indulgence is novelty -- with luck, I'll be harvesting black popcorn, loofah sponges, poppy seeds, and paprika in a few months.

But I do need a new mint plant.

Happy spring!

Tuesday, March 1, 2011

Broccoli, Almond and Lemon Zest "Pesto"


This is so delicious that I ended up eating it on the top of a toast.
Last week was crazy: Kids were enjoying a Winter break, one was sick and they were running around most part of the time. I just encountered peace in the kitchen, now and them baking friendly cookies to cheer up, trying new ingredients and developing new recipes.
Above all things that came from the kitchen during the whole week, my favorite  creation was this one. I shared some of it with Darienne and her boys. Some loved it, some didn't care for it.
Also, it has other beautiful characteristics: it  includes lemons - my latest passion- and almonds. Not to mention that it brings the wonderful broccoli. And all the goodness of those powerful foods.  After some research about the origins of Pesto alla Genovese - my favorite Italian sauce-  I found out that its name comes from the method used to prepare it - the old kitchen gadgets, the pestle and mortar.
Not intimidated by tradition, though, and short of ingredients in my fridge and pantry, I needed something fresh to serve with my vegetarian feast. And tested this sauce. The black stone pestle and mortar I have were sitting on the countertop. And so was the food processor. The second won, as I was short of time. But I promised to myself that next time I will make it like my ancestors, using the pestle and mortar, and perhaps will go for the traditional recipe. In the meantime, I already reviewed this recipe, ate it again yesterday on the top of a toast. Perhaps tomorrow I will toss it on a delicious homemade pasta.


Almond, Broccoli and Lemon Pesto

1 cup broccoli florets,  chopped
2 teaspoons garlic, chopped, (or 1 teaspoon garlic powder)
8 almonds, roasted, unsalted, whole
4 oz Parmesan cheese, in a chunk (or 1/4 cup shredded)
1 plus 4 tablespoons extra virgin olive oil
1 to 2 tablespoons lemon juice
1 teaspoon lemon zest, chopped
Kosher salt to taste

Heat small skillet with 1 tablespoon olive oil. Add broccoli and garlic and shallow fry on medium heat for about 5 minutes. Add warm broccoli and all other ingredients in a food processor and pulse up to when it reaches a coarse texture. Add salt to taste. Add more olive oil and pulse more if you want it creamier. Dress it up with a few curls of lemon zest. 

LinkWithin

Related Posts Plugin for WordPress, Blogger...