Monday, June 25, 2012

Sweet Corn and Coconut Ice Cream

In Brazil, at around this time of the year, people celebrate St. John's and St. Anthony's month with a party called Festa Junina. From busy urban centers to small towns, it's celebrated everywhere even if you're religious or not, Christian or not. The dress-up code is quite peculiar: Everybody looks like living in a farm, and usually, girls look like rag dolls and boys like scarecrows. Kids just love it!
Besides the hilarious music and traditional dance, one of the sweet memories I have about the month are the flavors of the festa junina: mostly corn and coconut based food seasoned with cinnamon.
While browsing amazing pictures of my friends and their kids ready to go to the parties, with a bit on envy, at Facebook, I came across this thought: why not bring the flavors of the festa junina to a Summer treat?  My kids were puzzled while they were trying to figure out what it was made of. If you are also curious and adventurous, that's a very nice flavor to add to your Summer.

Sweet Corn and Coconut Ice Cream
You can use either fresh corn or frozen. I just would avoid canned, because  it just doesn't taste fresh. 

1 small bag frozen organic yellow corn
1 cup coconut milk (or milk)
1 cinnamon bark
1 can sweet condensed milk
1 cup heavy cream
Ground cinnamon
2 tablespoons dry unsweetened coconut (optional)

Bring corn and coconut milk to a boil and simmer with cinnamon bark for about 10 minutes. When cold enough to the touch, blend the mix with a hand blender and pass contents through a sieve, with the help of a wooden spoon, or through a food mill. Mix the corn cream with condensed milk and cream and again blend it with the help of a hand blender up to when very smooth. Process ice cream maker for about 27 minutes or as indicated by your machine. Freeze for about two hours and serve.


Wednesday, June 13, 2012

Road trip trail mix, a souvenir you can eat

120607_CPE_road trip trail mix_3


My family will cover a lot of territory in our summer travels, and the kids are helping us plan: what to see, what to do, what to bring home, and even what to eat. My 8-year-old, inspired by a camp theme day as his brother's preschool, offered a brilliant idea for snacking on the go: road trip trail mix!

The basic idea: Pick up something from each place you visit and add it to the mix. We can get dried coconut in Kauai, he suggested. (I'll want pineapple and macadamia nuts too!) In New England, we'll get dried cranberries. Trail mix is always good with M&Ms, and lucky for us we'll be swinging through New Jersey, home to candy maker Mars.

120607_CPE_road trip trail mix_1

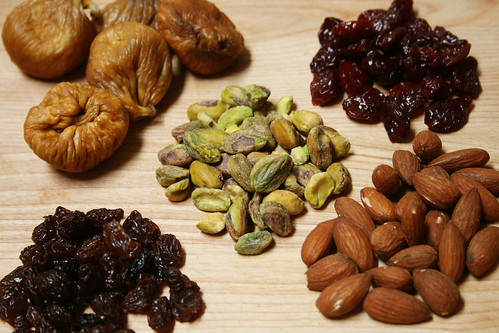
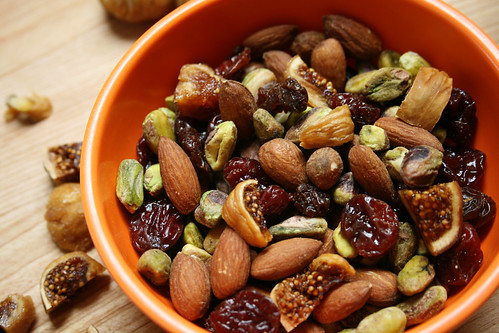
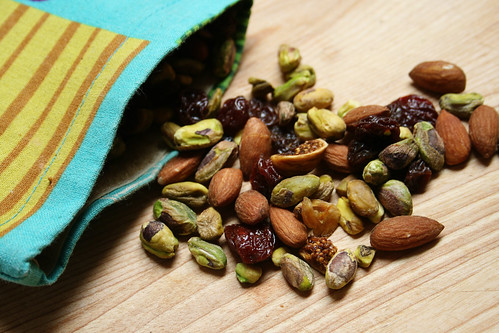
We made this sample mix with some of our California favorites: Calimyrna figs, cherries, almonds, Thomson raisins, and pistachios. (Chopped figs weren't a great idea — if you try this blend, you might want to pass on figs, which have rather gooey insides.)

We've agreed that in such a serendipitous blend, there's something for everyone — and something someone won't like. So folks can pick out bits without complaining. (Crossing my fingers that works.)

Another ground rule: We'll settle for foods that evoke the places we visit. This is supposed to be a fun souvenir-in-progress, so we won't knock ourselves out pursuing the most authentic, locally sourced ingredients.

My son calls it Roadie Trail Mix. I call it the perfect road trip snack.

120607_CPE_road trip trail mix_2

Friday, June 1, 2012

Going Bananas! Mini Banoffee Pie


I will never forget the day I found out about the existence of that delicious pie. To cut a very long story short, I was a student living in England and sometimes I would save some money to visit a more elegant restaurant far from the cafeterias on campus. When I read "Banoffee Pie" in the menu, I couldn't resist and ordered it right after a very brief explanation by the waiter: His mouth was watering while he was describing it, and he said something like "It's never too late.. time to try it."

So here's a very simplified version that might get your kids as crazy as ours about it: They can help put the ingredients together and may love the mix of textures contained in a single bite. The amazing thing about this recipe is that the toffee was made with a staple from my country of origin: a whole can of condensed milk cooked for 1 hour in a pressure cooker, which turns out to be the most perfect toffee or dulce de leche with many uses.

Easy Banoffee Pie

The British touch here resides in the amazing Digestives cookies by McVities. They can be found online at Amazon and Cost Plus World Market.

1 package Digestives cookies
1 can condensed milk
6 bananas
whipped cream or Greek yogurt for the top
chocolate sprinkles (optional)

To make the dulce de leche, put the unopened can of condensed milk in a pressure cooker with enough water to cover the can and cook for 1 hour. If you don't have a pressure cooker, put the unopened can in a heavy pot and cover with water, then cook for about 2 hours (refill the water when it goes below the can level). Leave the closed can in the pan to cool, and then refrigerate until well chilled.

Open the can and use a spatula or knife to spread a layer of dulce de leche over a cookie, then add slices of banana on the top, and finally top with whipped cream (or Greek yogurt for a lighter version) to cover the bananas. Finish with chocolate sprinkles, relax, and there you will have a delicious dessert or treat. 

LinkWithin

Related Posts Plugin for WordPress, Blogger...