Tuesday, July 27, 2010

Playdate Special: Baking Camp, Pretzels!

Summertime, and the living is easy... and not so hot here. Kids are playing well and happily but are looking for something else to do, other than the obvious water-based fun. The solution was: Baking . It took me a while to decide exactly what we would make and bake, but the idea of preparing dough in the backyard seemed to me a nice one. Or, at least, a neat one: Crumbles and flour are all so very welcome to fall on the patio floor.
But what to make? Cookies were too sweet. Bread? Nope. Brownies? No way they would not be convinced of eating lunch.
After consulting some of my books I found out one recipe that was looking infallible. Nobody wants to see kids frustrated with an vague result. And what could be more fun than preparing your own pretzel?

The project looked irresistible: besides the basic recipe, the Preschoolers and Pre-Ks would shape the pretzel and sprinkle with their favorite top. On the side, three types of dip (salmon cream cheese, bruschetta and cilantro cream) would provide the other needed nutrition while a summer drink and some slices of cucumber would guarantee that also the moms would love the playdate.
The basic recipe for the pretzel is from Emeril Lagasse.  I know that his baking recipes work wonders. I also tried a variation with wholemeal flour that didn't work so fine.  It didn't raise enough and its texture was not looking or feeling right.

What follows here are some steps to steps of how to prepare the "bakery" so that the kids will enjoy the process and eat them all!

1. On the night before the playdate, put all ingredients on the counter, and read the basic recipe again to make sure that nothing is missing. Add to the list ingredients that might work to coat the pretzels. Here we used poppy seeds, sesame seeds, grated Parmesan cheese and kosher salt.
2. About 3 hours before prep time, mix the dough and let it raise.
3. In the meantime make sure you have all the necessary gadgets available: Rolling pin, egg whisker, mixing bowls, pastry brush, ruler or pastry mat, a clean surface that they can roll the dough.
4. Check that everything is lined up before inviting them to start. Right before going to the working table or counter, remember them to wash their hands well.
5. Preheat the oven.
6. Reserve tools and ingredients for each part of the process: first dough to be flattened, than the measuring and cutting part, then shaping them, painting them with egg. Positioning the pretzel on the baking sheet might be tricky, so it's better to do it  before egg-painting and sprinkling. The sprinkling time is at the very last moment to finish.
7. After removing from the oven, let the pretzels cool down a little bit, to avoid the complaint that "Mama it is too hot to eat".
8. Enjoy your own pretzel while kids are proud to eat their own work of art dipped in their favorite spread.


Saturday, July 24, 2010

Tips and Gadgets: Cindy's Cheese Crackers

The first batch of cheese crackers just came out of the oven. And it's almost finished. This posting is just to share with you this great recipe from Fix Me a Snack, by Cindy.
This Friday we had the ideal time to bake them.  One kid was at arts camp and the other here at  our own improvised baking camp. The little baker helped me to measure the flours, sprinkle the salt, stretch the dough. His review was simple when he had the first mini cracker: "Hmmm, Hmmm! Yum". The second one,  when arrived at home, who loves cheese crackers of all shapes and colors  just said: "These are the best in the world".

I am specially cautious when baking,  so I followed this recipe by the book. I just changed the salt and cheese types. I had kosher salt in my pantry and instead of Sharp Cheddar I used  Monterey Jack cheese. Also, I had fun doing them in another shape, and they turned just perfect, next time I will do the pastry more like paper thin. The whole process is so well written that even a impatient baker - like me- will do it with no trouble.  Thank you Cindy for sharing your cracker Nirvana!


Wednesday, July 21, 2010

Playdate Special: Eggs for a Shakshuka

Eggs always fascinate my culinary curiosity. And when they are the stars of the dish - and not just a supporting actors- they really provoke my courage to experiment.  That's exactly the case with the Israeli shakshuka. The first and last time I tried this ideal brunch meal was in the same place. The charm and mystery of the shakshuka once again called me to investigate its origin: North African, for sure. And I also read somewhere that the name comes from the Hebrew verb "to shake". And at the restaurant Hendale (something like cute), hidden in between flower greenhouses and crops of organic strawberry, shakshuka is really memorable. It is au gratin with some Romanian Cashkeval cheese and lots of fresh spinach. So good that I never even tried to order it from another place.
And I was so pleased with it that I dared to bring it to a playdate. Kids were not impressed by its looks, but ended up calling it "yummy" instead of initial sincere "yucky". I served it with another staple of the Israeli restaurant, the baked yam. Darienne approved it and even not being a big fan of eggs, she agreed that so many things happen on the dish that eggs get somehow a second -role.
With you, another inspired Israeli recipe, a free interpretation of what I tasted at Hendale.

Shakshuka with Spinach and Cheese Crust
As eggs play the main role of the dish, I use my favorite large brown eggs. Mostly I love to bring the happiness of  free range chickens, well fed with Omega-3, to my table. And my experience shows that the best the egg, the yummier the result.
1/2 cup yellow bell peppers, julienned
1/2 cup orange peppers, julienned1/2 cup red bell peppers, julienned
1/2 medium red onion, diced
1 tablespoon olive oil
4 cups tomato diced in tomato juice (canned) , your home-made tomato sauce or your favorite tomato pasta sauce
Fresh or dried herbs such as basil, marjoram, thyme or parsley (choose your favorite)
4 to 5 eggs
2 cups Popeye Sauce or you may use your favorite jar of Alfredo sauce and add spinach to it with a blender
Salt to taste (if you use the tomato sauce it wont probably be necessary)
Freshly ground pepper to taste
Paprika, to taste (optional)
Parmesan and mozzarela cheese, to cover

Coat a large oven-proof skillet with olive oil. On a medium-high heat, add onions and bell peppers. When they are almost brown add tomatoes from a can or your favorite tomato sauce. When boiling, lower the heat and add each egg at a time in one of the sides of the pan. When whites start to become white, cover with a generous stream of green sauce (Popeye or made of spinach and alfredo). Add cheese and transfer it to the oven on the broil mode. Broil on low up to when the cheese melts and forms a crust. Enjoy it with pitta bread or baked za'átar yams.


Friday, July 16, 2010

Cold-Brewed Iced Coffee


Most moms I know have complained, at one point or another, about not being able to fit in a morning shower. But they always get their coffee.

I have the opposite problem. I've never skipped the shower, but there's rarely time to brew coffee. I'm the only one with a java habit in our home, so no one else misses it.

Come summer, cold-brewed coffee solves my problem (and saves me from dropping a lot of cash at a certain coffee shop). Just after the kids go to bed, I stir coffee grounds into a jar of water and leave it on the counter. In the morning, I strain it through a coffee filter once or twice, toss the used grounds in the grass or compost heap, and enjoy some strong, smooth iced coffee.

This coffee concentrate stays good in the refrigerator at least a week or two. It works well in recipes requiring strong coffee. You also can zap it in the microwave for a hot cup.

Cold-Brewed Iced Coffee

Scale the recipe to make as much as you want. I usually make a double or quadruple batch.

3-4 tablespoons ground coffee
1 cup water

Put coffee in a glass jar and add water. Stir with a chopstick or butter knife to combine. Put lid on jar and let sit on counter for 12 hours (overnight).

Line a small fine-mesh strainer with a coffee filter, and set strainer over a small bowl. Pour coffee and water through strainer; repeat if strained coffee looks sludgy. Rinse remaining coffee grounds from jar and lid. Pour coffee concentrate into jar and store in refrigerator.

To make coffee, combine equal parts water and coffee concentrate, or to taste, adding milk, cream or sweetener as desired. And lots of ice. Try adding sweetened condensed milk for an easy Vietnamese coffee. For hot coffee, heat in microwave.

Tuesday, July 13, 2010

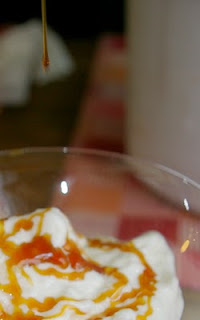
Playdate Special: Coconut Tapioca Frozen Cream


There I was in the middle of one of the cafés at the amazing California Academy of Sciences when I saw that tempting beauty: one small jar of tapioca cream with something on the top, perhaps a syrup or jam made of fruit. That was enough to trigger a little old obsession. I  was in a rush to see the albino alligator, so didn't have time to eat it.

At that point, though,  I didn't know if I was daydreaming -- probably one of the jet-lag effects, but I knew it was time for me to experiment again with tapioca pearls. I grew up having tapioca pudding (called sagu where I come from) always a treat from my grandma's kitchen. I don't know the original recipe, but remember well it was cooked in grape juice and served with créme anglaise. Later I ate it cooked in diluted red wine instead of grape juice. And just about three weeks ago, my mother-in-law prepared a cake with it to celebrate my husband's birthday.

Because I was craving it, I decided to go for a very reliable brand and ordered it as soon as I could to not make a mistake. Last time I tried to prepare tapioca, it was a disaster, mainly because it was a bit sour, probably because of the type of cassava used to make it.

So there I was with my project for the playdate: I wanted to make ice cream, tapioca coconut cake and tapioca pudding from my grandma. The result was what my kids loved. Darienne went home with one package of pearls hopeful that her older boy would like it. He did. And on Saturday, some of our guests and their kids tried the dessert before it was frozen. And went home with little samples and the desire to eat more. They were so pleased that they asked for this very simple recipe, that I now share with you.

Tapioca Coconut Frozen (or not) Cream 


The brand of tapioca is important for this one here. You can also try to make it with the large pearls. And let me know how was that! I served it with a swirl of organic dates syrup. And I and Darienne believe that you can add other delicacies over the top, or even inside the mix, such as cardamom, nutmeg, cinnamon or other syrup.

1 cup uncooked tapioca white pearls
2 cups water
2 cups nonfat or 2% milk
1 can organic coconut milk
1 can sweet condensed milk

Soak tapioca for at least 30 minutes before  cooking. Add milk and bring to a boil. Simmer the mix, adding condensed milk, and cook on low heat for about 20 minutes or until you see that the pearls are transparent and the mix has a pudding look. Add coconut milk and cook for about 5 minutes more. You can now include your favorite spice, such as cardamom or nutmeg. Cool and and transfer mix to an ice cream maker. Process it for about 30 minutes. Serve it right after preparation or freeze it. 

Friday, July 9, 2010

Second Helping: Inspired Aroma Salad


One of the best salads I had while on vacation was made with three of the main Israeli ingredients: Fresh chopped cucumbers, tomatoes and lots, lots of good extra virgin olive oil. The specific one that I keep dreaming about over and over again was surrounded by quinoa and was topped with grilled eggplant, haricots vert (one of my favorite ingredients in life), mint and a bit of green onions.

I tasted it between one laugh and another with my friend Tamara, who lived here in the Bay Area and now is living in Tel Aviv. We met to catch up in a chain cafe called Aroma, where generous bowls of salad share the stage with coffee. I would dare saying that's exactly what makes the place so specially Israeli: They could not live without salad. Nor good and strong coffee. Any time of the day.

So, after tasting it I could not forget it. I tried one interpretation of it for my husband's birthday and the second time I prepared it was for our last playdate. We were lucky to have Darienne's grilled eggplant and fresh mint form her garden to help achieve the maximum perfection. My boys obviously decided not to eat it. But they tried before and liked it. So, peer pressure was there and no person under the age of 6 touched the micro portion on their plate.

In the meantime I was pleased to watch Darienne and Doug trying it - and enjoying it! So I hope to share the same pleasure with you here in this very simple recipe .

Israeli Inspired Salad

I used a very nice crunchy cucumber, called here Persian, and seasonal sweet tomatoes. But I am sure that most of the success of this salad lies on the quality of the olive oil. 


4 cups cooked quinoa, prepared as instructed by package plus 2 tablespoons olive oil
3 ripe sweet tomatoes, chopped in 1/2-inch cubes with peel and seeds
4 small cucumbers (Persian) or 2 big sized cucumbers (English), chopped in 1/2-inch cubes, peel on
Enough olive oil to involve all ingredients
Juice from one lime
Kosher salt, to taste
1/4 medium purple onion, chopped in tiny cubes (optional)
4 slices grilled eggplant (see Darienne's recipe here)
Haricot verts, to garnish
Mint leaves, chopped to salad and whole leaves to garnish
Chives or spring onions, to garnish

Mix all ingredients but don't overdo it: you want to see all chunks there and quinoa grains involving them. Top bowl with French green beans, eggplant, mint leaves, chives or spring onions.

Tuesday, July 6, 2010

Playdate Special: Pomegranate White Tea Panna Cotta with Blueberry Gelée

07022010_CPE_pannacotta_1

I'm addicted to flavor infusions. Just this morning I was making plain sugar syrup for a quick sorbet, but then I found myself headed out to the rampaging mint plant, scissors in hand. Minted syrup it is, then.

I can't help it. Infusions are so simple, and they can bring so much to a dish: seasonal flavor, whimsy, subtle surprise, elegance.

Panna cotta and gelées are perfect for playing with infusions, and score big points for impressive results with minimal effort. I've only just begun to make them, and am learning as I go. In my first stab at panna cotta, I tried incorporating yogurt to lighten it up. The result had good flavor, but it was oddly clumpy, far from creamy, smooth panna cotta.

My second try was much better. I steeped Trader Joe's Pomegranate White Tea in a blend of heavy cream, half-and-half, and low-fat milk, and was rewarded with silky, sensuous panna cotta. There was a bit of separation -- the top was noticeably creamier than the bottom -- but it was an insignificant price to pay for the prospect of savoring panna cotta on a regular basis.

I set the panna cotta over a layer of blueberry gelée, to mixed reviews. The kids didn't touch the gelée. My husband loved it. Anna liked the combination, but she noticed the tiny lumps of gelatin I couldn't quite dissolve. I would have preferred a thinner layer, or perhaps a few cubes of gelée atop the panna cotta. Or maybe toasted almond slices.

If you want to go easy on the gelée, scale that part of the recipe by half. I like this version, but I can see it going in a few different directions; at the end of the recipe, I note two variations I plan to try. This takes some time for steeping and chilling, but hands-on time is pretty light.

Pomegranate White Tea Panna Cotta with Blueberry Gelée

I used equal parts parts heavy cream, half-and-half, and low-fat milk. The tea is from Trader Joe's; you can substitute any tea you'd like. This makes 4 to 8 servings, depending on the size of your serving dishes.

For gelée:
1 1/2 cups blueberries
1/2 cup sugar
2 teaspoons gelatin
squeeze of lemon juice
1 1/2 tablespoons red wine (optional)

For panna cotta:
3 tablespoons water
1 package gelatin
3 cups cream or half-and-half (can substitute milk for up to half the cream)
1/2 cup sugar
3 bags pomegranate white tea

Wash blueberries and puree in blender or food process. Strain berries into saucepan, add sugar, gelatin, lemon juice and red wine, and stir to combine. Let sit for 10 minutes, then bring to a boil. Remove from heat and pour into serving dishes. Chill at least 30 minutes.

Sprinkle gelatin over water and let sit for 5 minutes. Warm cream over low heat and add gelatin, stirring to dissolve completely. Add sugar and cook, stirring, over medium heat, until mixture begins to steam. Turn off the heat, add tea bags, cover, and let sit for 30 minutes.

Press tea bags against side of pan. If they burst, strain the cream mixture. Pour panna cotta into glasses and chill.

Rose-scented: In the panna cotta, substitute rosewater for half to two-thirds of the water.

Vanilla Bean Syrup: Stir together half a cup of sugar, half a cup of water, and a vanilla bean, halved lengthwise, in a small pot. Bring to a boil and simmer for 20-30 minutes. Let cool, then remove bean. Drizzle over chilled panna cotta.

Friday, July 2, 2010

Cookout Week : Shrimps Skewers with Orange and Dill

When I was little, I always liked to see wooden skewers on the grill. They looked cute and helped me eat morsels of chicken, beef or shrimps. This magic also worked with the boys here: Not that they just loved to unthread the shrimps from the skewers, but also they enjoyed the sweetness of the seasoning.

This recipe is very simple, yet it brings some different touches. Fresh herbs from the garden and orange juice (from the tree I have in the backyard) were an improvised way of seasoning while we were laying the charcoal in the grill.  Add to that some patience to wait for the perfect timing to let them become golden and delicious.

This marinade here can also be used for different types of fish: We tried it already with fresh salmon, and it was great. I suggest, again, to make sure that the shrimp choice can be healthy for you and the environment checking the Seafood Watch from Monterey Aquarium.

Grilled Shrimps in Orange and Dill Marinade


1 pound raw medium shrimps, cleaned, tail on
2 cups fresh orange juice
2 tablespoons extra virgin olive oil, in a mister
Kosher or Coarse sea salt, to taste
Dill or other herb that might bring more "colors"to the orange juice
Ground white pepper, to taste

First of all, don't forget to soak the skewers in water some hours before prep. Wash and pat dry shrimps, and in a bowl cover them with orange juice, salt and dill for at least 30 minutes. Take them out of the marinade, thread on to skewers and reserve the juice with seasonings it to use for basting while grilling.  Coat shrimps with olive oil. Grill skewers on the top of a medium- hot grill and keep turning it up to the point that flesh is orange. Enjoy with freshly ground white pepper with some drops of lemon. 

Thursday, July 1, 2010

Cookout Week: No-Fuss Grilled Pizza

100621_grilled eggplant pizza_09


I had a lot of fun in my mom's kitchen, but some of the best times were pizza nights. Birthday parties, sleepovers, and visiting friends were occasions for my mother to make pizza dough from scratch, and we'd gather around to pick and choose among a dozen toppings.

I'm trying to keep the tradition alive with my kids, but it can be chaotic. Timing the rise of the dough, prepping toppings, helping young (and always enthusiastic) kids through the process, then shuffling pizzas through the oven... And that hot oven! At 500 degrees, the kitchen becomes a sauna.

Grilling pizzas is a summer-friendly alternative, but it's even more difficult to manage with a crowd. You have to stay on top of the dough, turning it at just the right moment, and then top the pizzas while they're on the grill. The logistics confound me: I've actually set pizzas on fire, which is not how I want to impress guests. I'd rather enjoy the company than fuss over the grill.

By partially baking individual crusts and freezing, the work is done ahead of time and the pizzas are much easier to handle. Just set out toppings, remove the parbaked crusts from the freezer, and let everyone design their own pizzas. Toss the pies on the grill and, minutes later, you have delightfully crispy pizzas -- with no risk of dough flopping into the flames or sagging between the grates.

For our playdate, my favorite combination was Grilled Eggplant with roasted red peppers, cherry tomatoes, black olives, and smoked mozzarella. The kids preferred crumbled hamburger -- leftover Drive-Through Burgers from an earlier barbecue -- with sausage and plain old mozzarella.

100621_grilled eggplant pizza_05

Grilled Pizza

Parbaking the crusts makes this easy to pull together for a crowd. Set out toppings and let your guests top their own crusts, then toss the pizzas on the grill for dinner in minutes. You also can finish these in the oven.

1 1/2 cups all-purpose flour
1 1/2 cups white whole wheat flour
2 1/4 teaspoons yeast (one package)
1 1/2 teaspoons sea salt
1 1/4 cups lukewarm water
1 tablespoon olive oil, plus extra for baking sheet
optional: fresh or dried herbs, ground flax seed

In a food processor fitted with a metal blade, combine the flour, yeast, and salt, along with herbs or flax seed, if using. Process the dry ingredients briefly, then pour in 1 cup of lukewarm water and the olive oil. Add more water, just a tiny bit at a time (you might not use the entire amount) and continue to process until the dough forms a ball. Turn out the dough onto a floured surface and knead for a minute or so to form a ball. Set dough in a lightly oiled bowl, cover with plastic wrap or a towel, and let rise for 1 to 1 1/2 hours.

Preheat oven to 500 degrees, or higher if your oven allows. Divide dough into as many pieces as you plan to turn into pizzas. For grilling or personal pizzas, I divide the dough into six pieces, but it also makes two full-size pizzas. Shape each piece into a ball and set on a floured surface. Cover with plastic wrap or a towel and let rest for 15 to 20 minutes.

Oil a baking sheet. Take each piece of dough and press it into a circle on the baking sheet, about 8 inches across for personal pizzas. Bake 5 minutes and remove to wire racks to cool. If crusts puff up, pierce with a sharp knife and gently press out air.

Once crusts have cooled completely, stack them one on top of another, with plastic wrap separating each layer, and wrap the stack with plastic wrap and then foil. Freeze up to a month.

To finish pizza, remove frozen crust from freezer, add desired toppings, and cook over a very hot grill until cheese is melted and bottom of crust is crispy.

LinkWithin

Related Posts Plugin for WordPress, Blogger...